Getting Started Invoicing Clients: Flexible and time-saving Invoicing allows you to send one at a time through the Client Account; or create all invoices that are ready to be invoiced at once through Bulk Invoicing. You can Invoice By Start Date of Service, or End Date, and you can take payment at the Time of Invoicing if you choose.
Note: To take Payment during Invoicing, see Getting Started: Accepting Online Payments.1. Bulk Invoicing
To Invoice clients:
- Select the Invoicing icon.
- Select a date range, to view un-invoiced service orders that START in the date range selected.
- Click "Reload."

2. Sort and Select Service Orders to Invoice
- Service Orders that START in the date range selected are displayed.
- To Invoice in advance of the service, click the word "Start" to sort by the Start Date of the Service.
- To Invoice after the service, click the word "End" to sort by the Start Date of the Service.
- Check the box for the Service Orders to select the appropriate invoices to create.
- Select "Create Invoices (Email)" to email clients their invoice.

3. Select Email Template and Create Invoices
- Select the Email Template you would like to use.
- Click "Create Invoices."

Advanced Bulk Invoicing features:
4. View Invoices
- Sample of an invoice email sent to a client.

- Invoices are saved in each Client Account.

- Invoices can be viewed by Invoice Creation Date in Bulk Invoicing.

5. Create and send an Invoice from a Client Account
As well as creating invoices that you can send to multiple Clients at once, you can also create invoices within a Client Account individually. A typical use for individual client invoicing would be for holiday deposit bookings by either creating an Invoice just for the deposit, or Invoicing for the entire service and requesting a 50% deposit.
Step 1
- Access the Client Account
- Click on "Orders & Invoices"
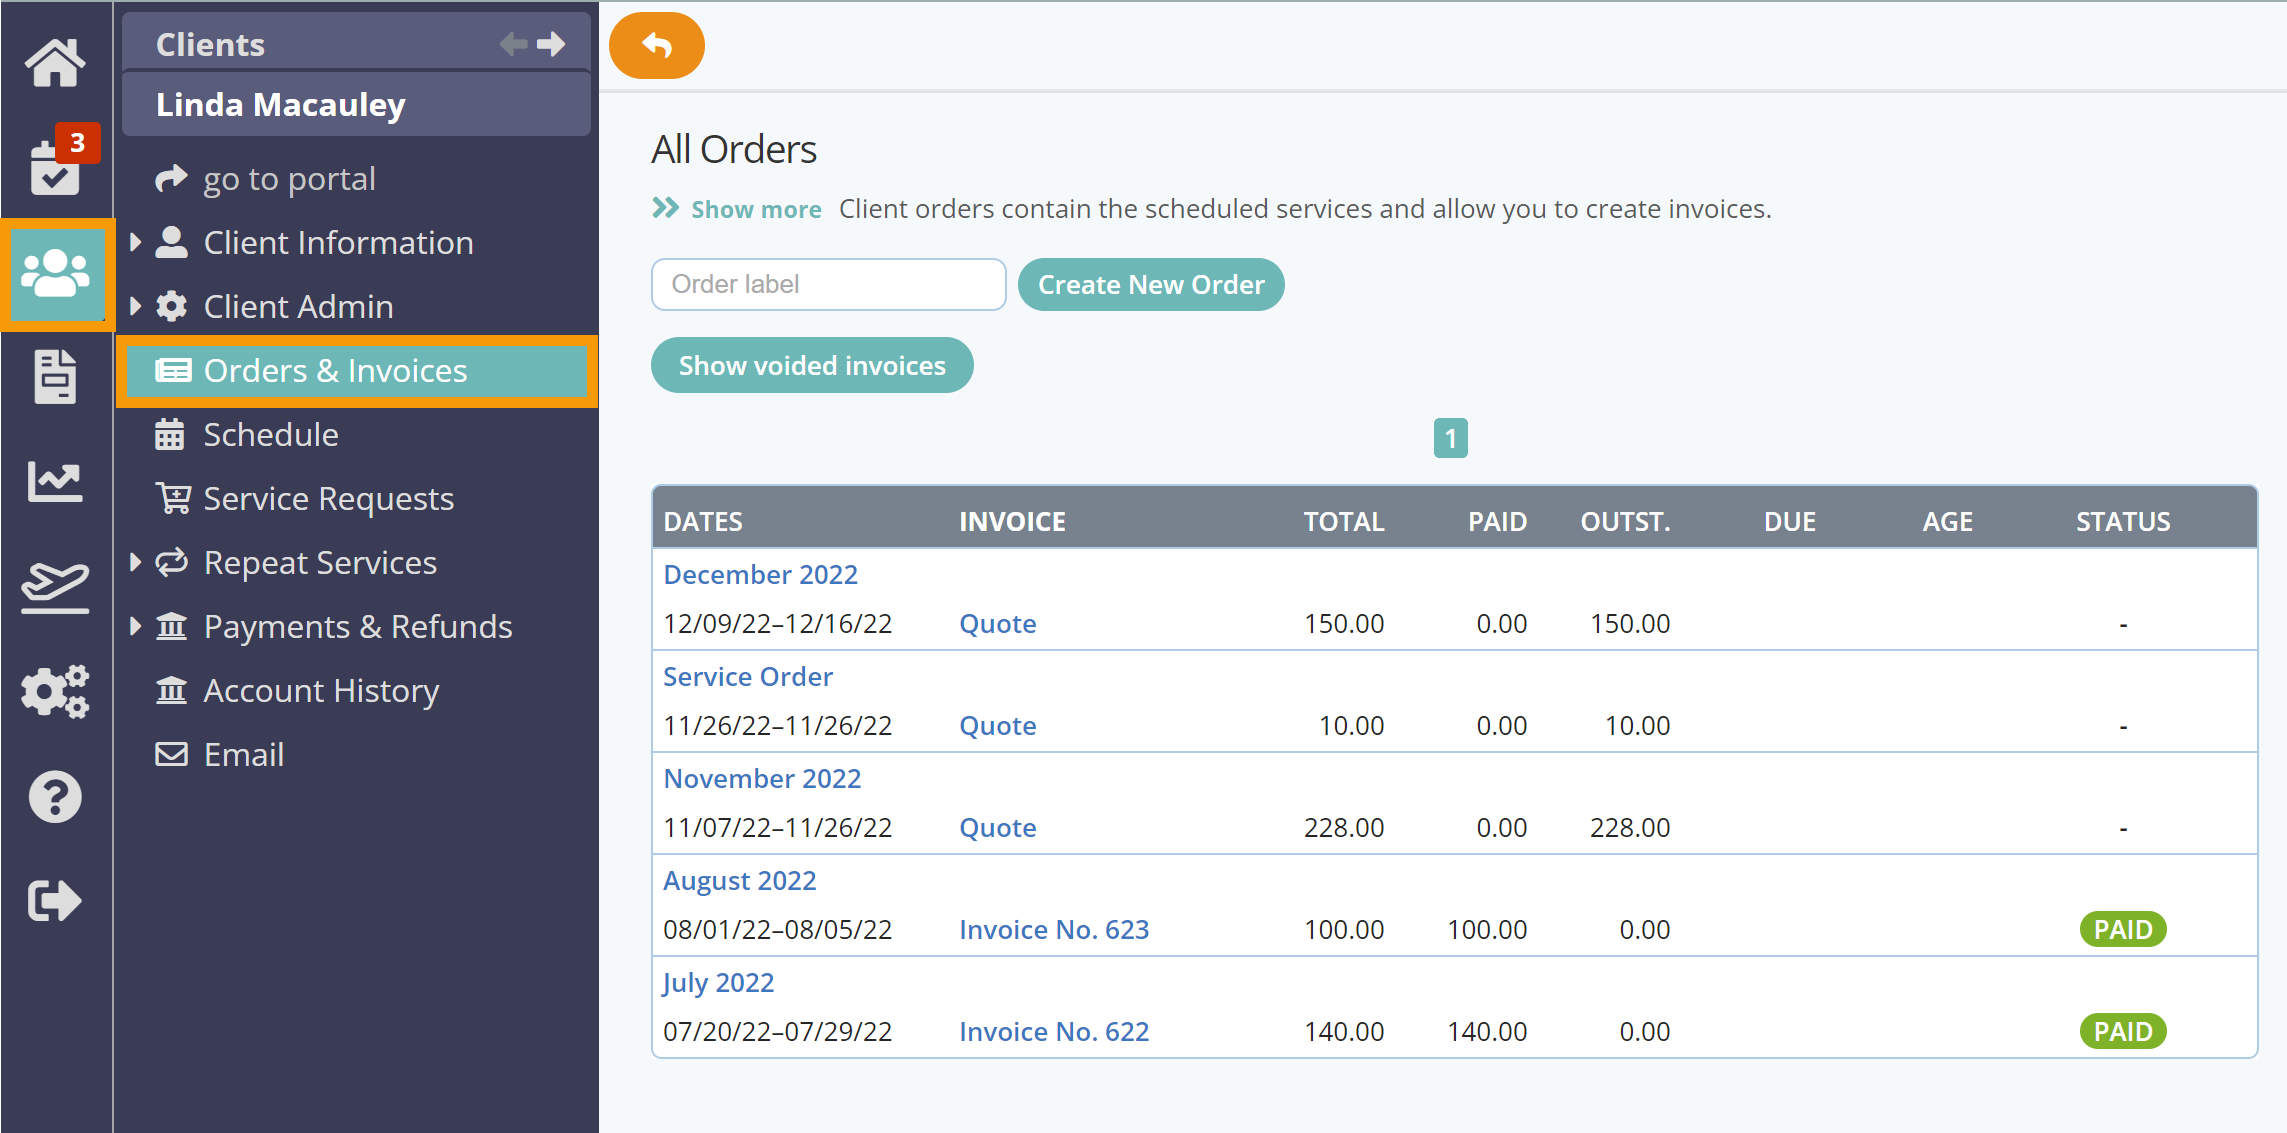
Step 2
- Click the blue word "Quote" to view the quote.

Step 3
- Click "Create Invoice" in the left-side navigation panel.

Step 4
- Check Invoice Settings and Email Options (see below).
- Toggle "Send Email to Client" ON.
- Toggle "Attach Account Summary PDF" ON to include a PDF list of other outstanding invoices due on a client's account.
- Select the Email Template.
- Click "Create Invoice."

Step 5
- An email with the Invoice PDF (and Account Summary PDF if selected) is sent. It is CC'd to Spouse / Alternative Contact and Emergency Contact 1 IF email addresses were added and IF "Copy Emails to this Address" is toggled ON.
- The invoice date is set to today's date and the due date is calculated according to Invoice Type on the Client's Settings page.
- A copy of the invoice is sent to your Admin email if you sent a copy to the client and the "CC Invoices to Company" box in "Invoice Options" is toggled "ON."

Signposts...
Learn how receive payments and email clients:
Was this article helpful?
That’s Great!
Thank you for your feedback
Sorry! We couldn't be helpful
Thank you for your feedback
Feedback sent
We appreciate your effort and will try to fix the article