Note: Admin Settings are the minimum configurations you need for your system to function properly. Further configuration guides are available from the remaining "Getting Started Guides". View all the Getting Started Guides.TABLE OF CONTENTS
- 1. Company Settings
- 2. Company Location
- 3. Company Logo
- 4. Date & Time Formats
- 5. Tax Settings
- 6. Client Settings
- 7. Staff Access
- 8. Staff Dashboard & Monitor
- 9. Staff Time Off
- 10. Service Report Settings
- 11. Timecard Settings
- 12. Vaccinations
- 13. Invoicing
- 14. Service Requests
- 15. Client Portal
- 16. Currency
- 17. Schedule Settings
- 18. Email Settings
- Signposts...
1. Company Settings
- Name: This field is used on Invoices, the Client Portal and is a Merge Code {COMPANY_NAME} that inserts your Company Name into emails and narratives exactly as it appears here.
- Email Address: This field is used when sending emails and is a Merge Code {COMPANY_EMAIL} that inserts this email address into emails and narratives.
- Reply-to Email Address: The email address responses to go for emails sent from Pet Sitter Plus.
- Vacation Alert Email Address: The email "Staff Time Off" requests are sent to (if using Time Off.)
- Phone Number: This field is a Merge Code {COMPANY_PHONE} that inserts this phone number into emails and narratives.
- Address: Appears on quotes, invoices and account summaries. This field is not a Merge Code.

2. Company Location
Pet Sitter Plus needs to know the Company Location so that other functions work in the Registration process for new clients.
To save your company location:
- Add your company address in the "Search" field.
- Click on "Save Location."

3. Company Logo
Upload your logo so it appears on Invoices and your Client Portal.- Ensure your logo size is 300px x 100px, 50KB and the format is either: png, jpg, jpeg or gif.
- Select "Choose File," navigate to your logo file on your PC/MAC and select it.
- Click "Update."
Tip: Take a look at the client portal from a client's perspective to check your logo looks OK.

4. Date & Time Formats
- Time Zone: Select your Time Zone, note some options do not adjust for Daylight Savings Time. If you are located in your Time Zone select "Set timezone based on your current location."
- Time Format: 12 Hour uses AM/PM; 24 Hour displays 2PM as 14:00.
- Date Format: Used on Invoices and Logs. Month/Day and Day/Month options.
- Long Date Format: Used in the Portal and Schedule. Adds Day of the week.
- Input Date Format: Used in all Date dropdowns when scheduling service and creating reports. Options including day of the week help reduce scheduling errors.

5. Tax Settings
- Tax Label: Displays on Invoices beside the tax amount. Using GST in this field also changes the Invoice title to Tax Invoice (instead of simply Invoice), using VAT changes it to VAT Invoice.
- Tax Code: Displays your Tax Code on Invoices.
- Default Tax Rate %: Displays on Invoices beside Tax Label to indicate tax percentage and calculates appropriate tax, Input Example: 20, do not include % symbol.
- Submitted Tax Date: Select date to log each time you submit tax payments.

6. Client Settings
For each client's account from the Client Admin screen, a number of functions can be enabled to govern the way their account operates within Pet Sitter Plus.
The Client Settings screen has two "Default" or Global settings which can be utilised to set all New Clients to a Default Invoice Type and a Default Staff/Primary Sitter.
Note: Enabling these functions, sets all NEW clients from this point forward to the selected default Staff/Primary Sitter or Default Invoice Type, but does not change previously set clients- Select your Default Invoice Type from the drop down box.
- Click "Update"
- Select your Default Staff from the drop down box.
- Click "Update."

7. Staff Access
You can choose to allow all your staff to have access to view ALL client accounts and/or update them. When enabled, the Clients icon appears on the Staff Dashboard to provide access to view all client information.
Tip: If you wish to give differing levels of access to your Staff, you can set these in Staff Permissions.
Options for Global (ALL) staff Access:
- Allow all staff to see client information: When toggled ON, the Client icon appears on the Staff Dashboard, allowing staff to access all, or some clients. You define which clients your staff can have access to, select from the drop down list your preference.
- Allow all staff to update client information: When toggled ON, as well as being able to view, your staff can also update client accounts.
- Hide teams, show backup sitters: This option should be enabled so you can access the Sitter menu and schedule a sitter to do a service. To use "Teams"

8. Staff Dashboard & Monitor
The Check In / Out settings within the Staff Dashboard & Monitor page, give your staff the ability to record an accurate check-in and check-out time and GPS location when they start and finish each visit. You can also set an exception tolerance in minutes to notify you if a staff member is late checking-in.

The Staff Dashboard Settings allow you to further add various functions to the Staff Dashboard, including showing Check in Exceptions, allowing Shift Editing and showing the Client Schedule.

9. Staff Time Off
Enable or Disable the ability for your staff to request time off, view other Staff scheduled time off and configure an email response to send to your staff when they request time off.

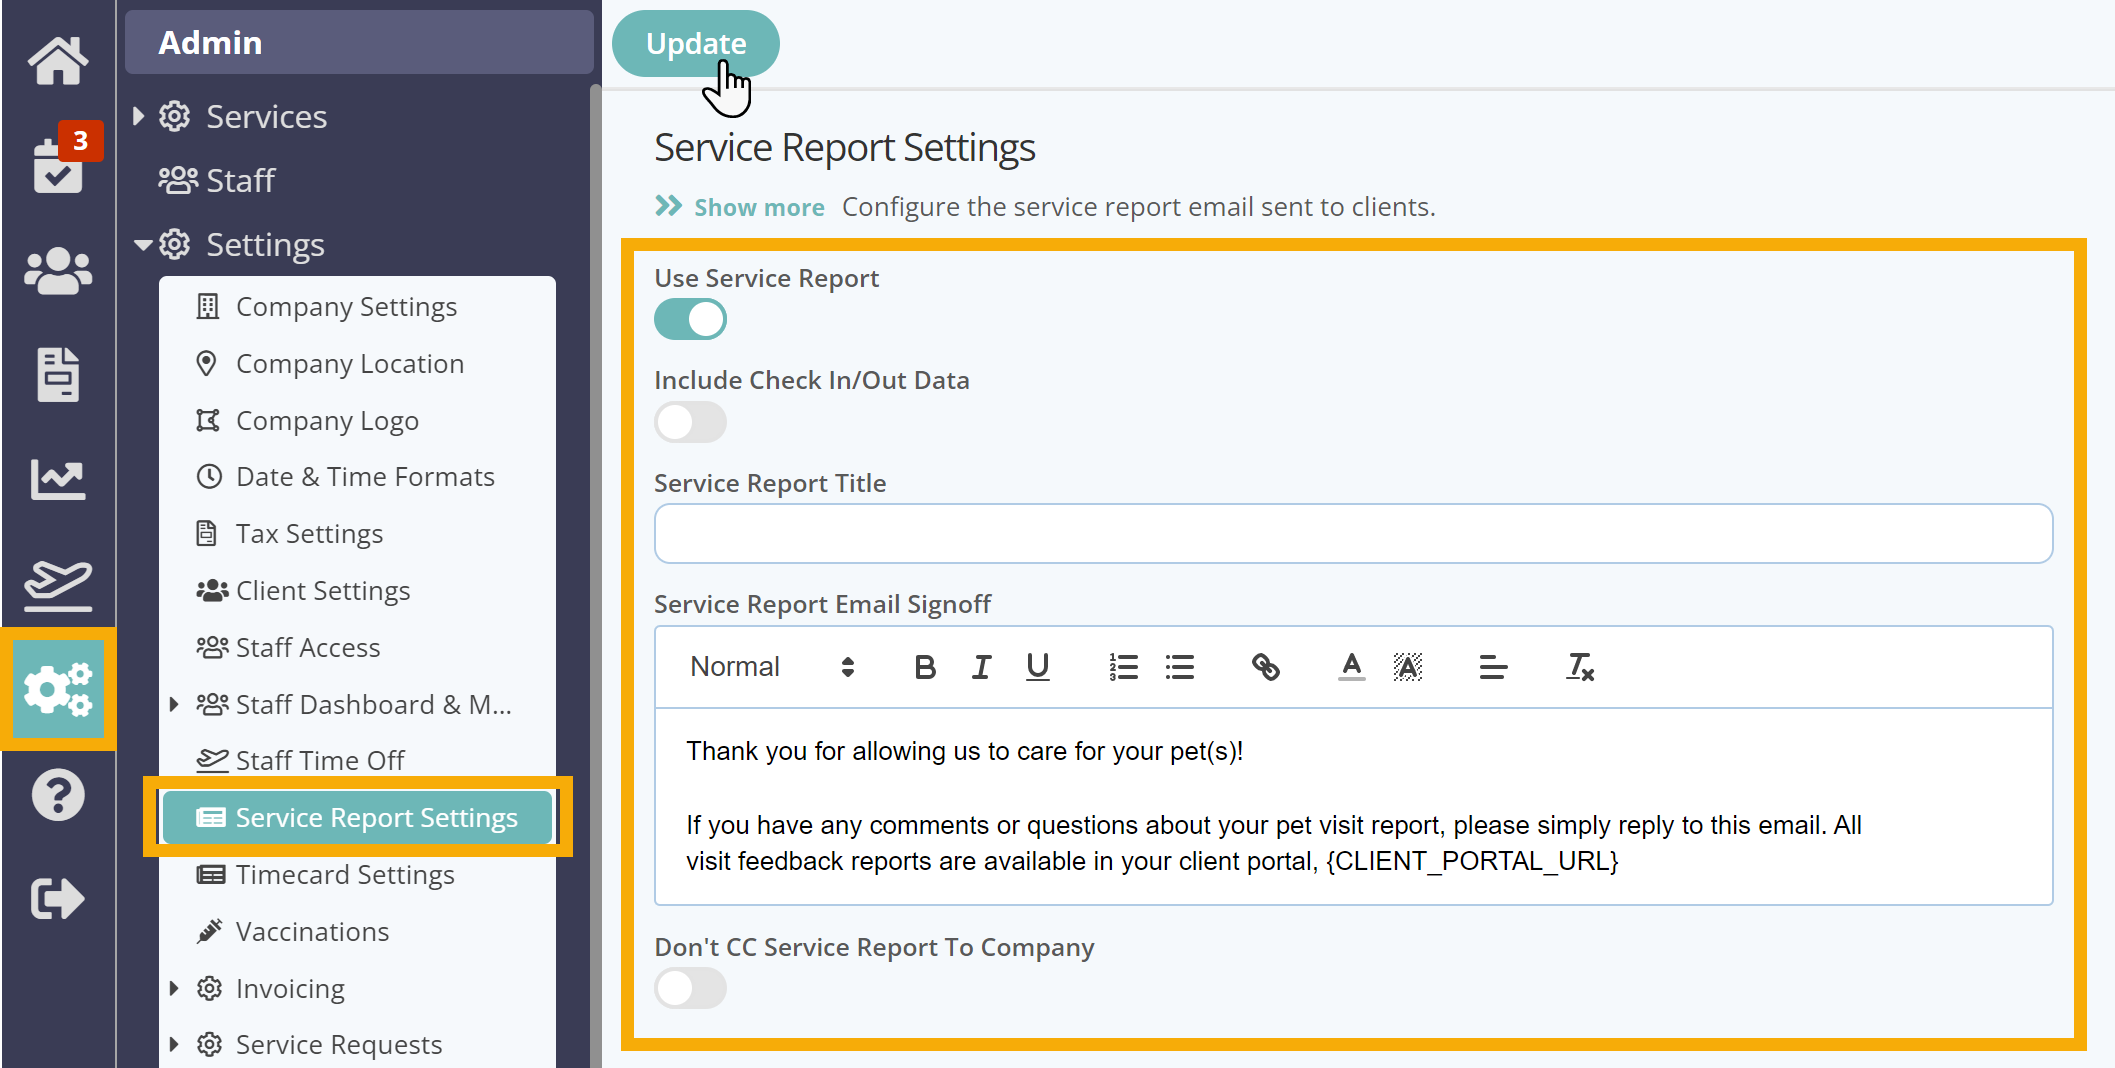
10. Service Report Settings
Configure the Service Report Email sent to your Clients. You can Include Check In/Check Out Data, change the standard narrative included in the email and give the Service Report email a Title.
11. Timecard Settings
Enable or disable the ability for your Staff to record their Shifts, Set a Travel allowance in Minutes and exclude travel time to and from last service.
- Travel allowance to and from service: Add a number (in minutes) to track travel, which is then exported on the Timecard.
- Exclude travel time to first and from last service: This eliminates the travel allowance on the way to the first service and after the last service.
- Record Staff shifts: Toggle ON, to show Start & End Shift buttons on the Staff Dashboard. This allows hourly-paid staff to record their time.

12. Vaccinations
Enable the Vaccination Module to record and report on your Clients pets vaccinations. Enabling Vaccination Flags provides a quick reference flag on incoming Service Requests, to identify if your Client's pets are up to date, or not, with their vaccinations. You can also produce your own written Vaccination guidance that can be viewed in your Clients Portal, here you can give guidance on which vaccinations you require for your business.
- Enable Vaccinations Module: Switch the entire module on or off depending on whether you want to use it.
- Allow clients to delete vaccination certificates: Prevent clients from deleting a vaccination certificate once it has been uploaded.
- Enable Vaccination Flags: The Vaccination Flag appears on the Service Request tab when clients use their Client Portal to request services online. Useful to identify the status of a client's pet vaccinations and to highlight if one of these has expired or the pet is unvaccinated.
- Show Vaccination Guidance: Vaccination Guidance is a function within Vaccination Settings and available for Admins designed to help your Clients understand what is required of them in relation to adding their Pets Vaccinations.

13. Invoicing
There are a number of Invoicing settings you can use to configure your own invoicing routines such as showing service times and sitters in your invoices or sending a copy of all Invoices/Quotes to your company.
- Next Invoice Number: Enter the number to be used on next invoice generated, helpful when switching over from a different billing system, otherwise leave as is.
- Show Service Times On Invoices: Toggle ON to add the service time beside Service description on Invoices.
- Show Sitter On Invoices: Toggle ON to add the sitter name beside Service description on Invoices.
- Show Reference to Account Summary on Invoice: Toggle ON to add “Please refer to your account summary for details of all required payments” on Invoices.
- Allow Adding Services To Invoiced Orders: Allows services to be added to an order after it is invoiced, permitting multiple invoices to be associated with one service order. Most clients set this to "ON."
- Enable Bulk Credit / Debit Card Charges: Toggle ON to enable payment processing from clients' stored Payment Method during invoicing, if they have provided consent.
- CC Invoices Or Quotes To Company: Toggle ON to send the company email a copy of each invoice and quote email.
- Email Payment Notifications: Toggle ON to default the setting to ON for emailing the client a receipt when entering payments.
- Late Pay Terminology: Customize the terminology used for Invoices that are overdue.
- CC Payment Notifications To Company: Toggle ON to send the company email a copy of each client payment made.

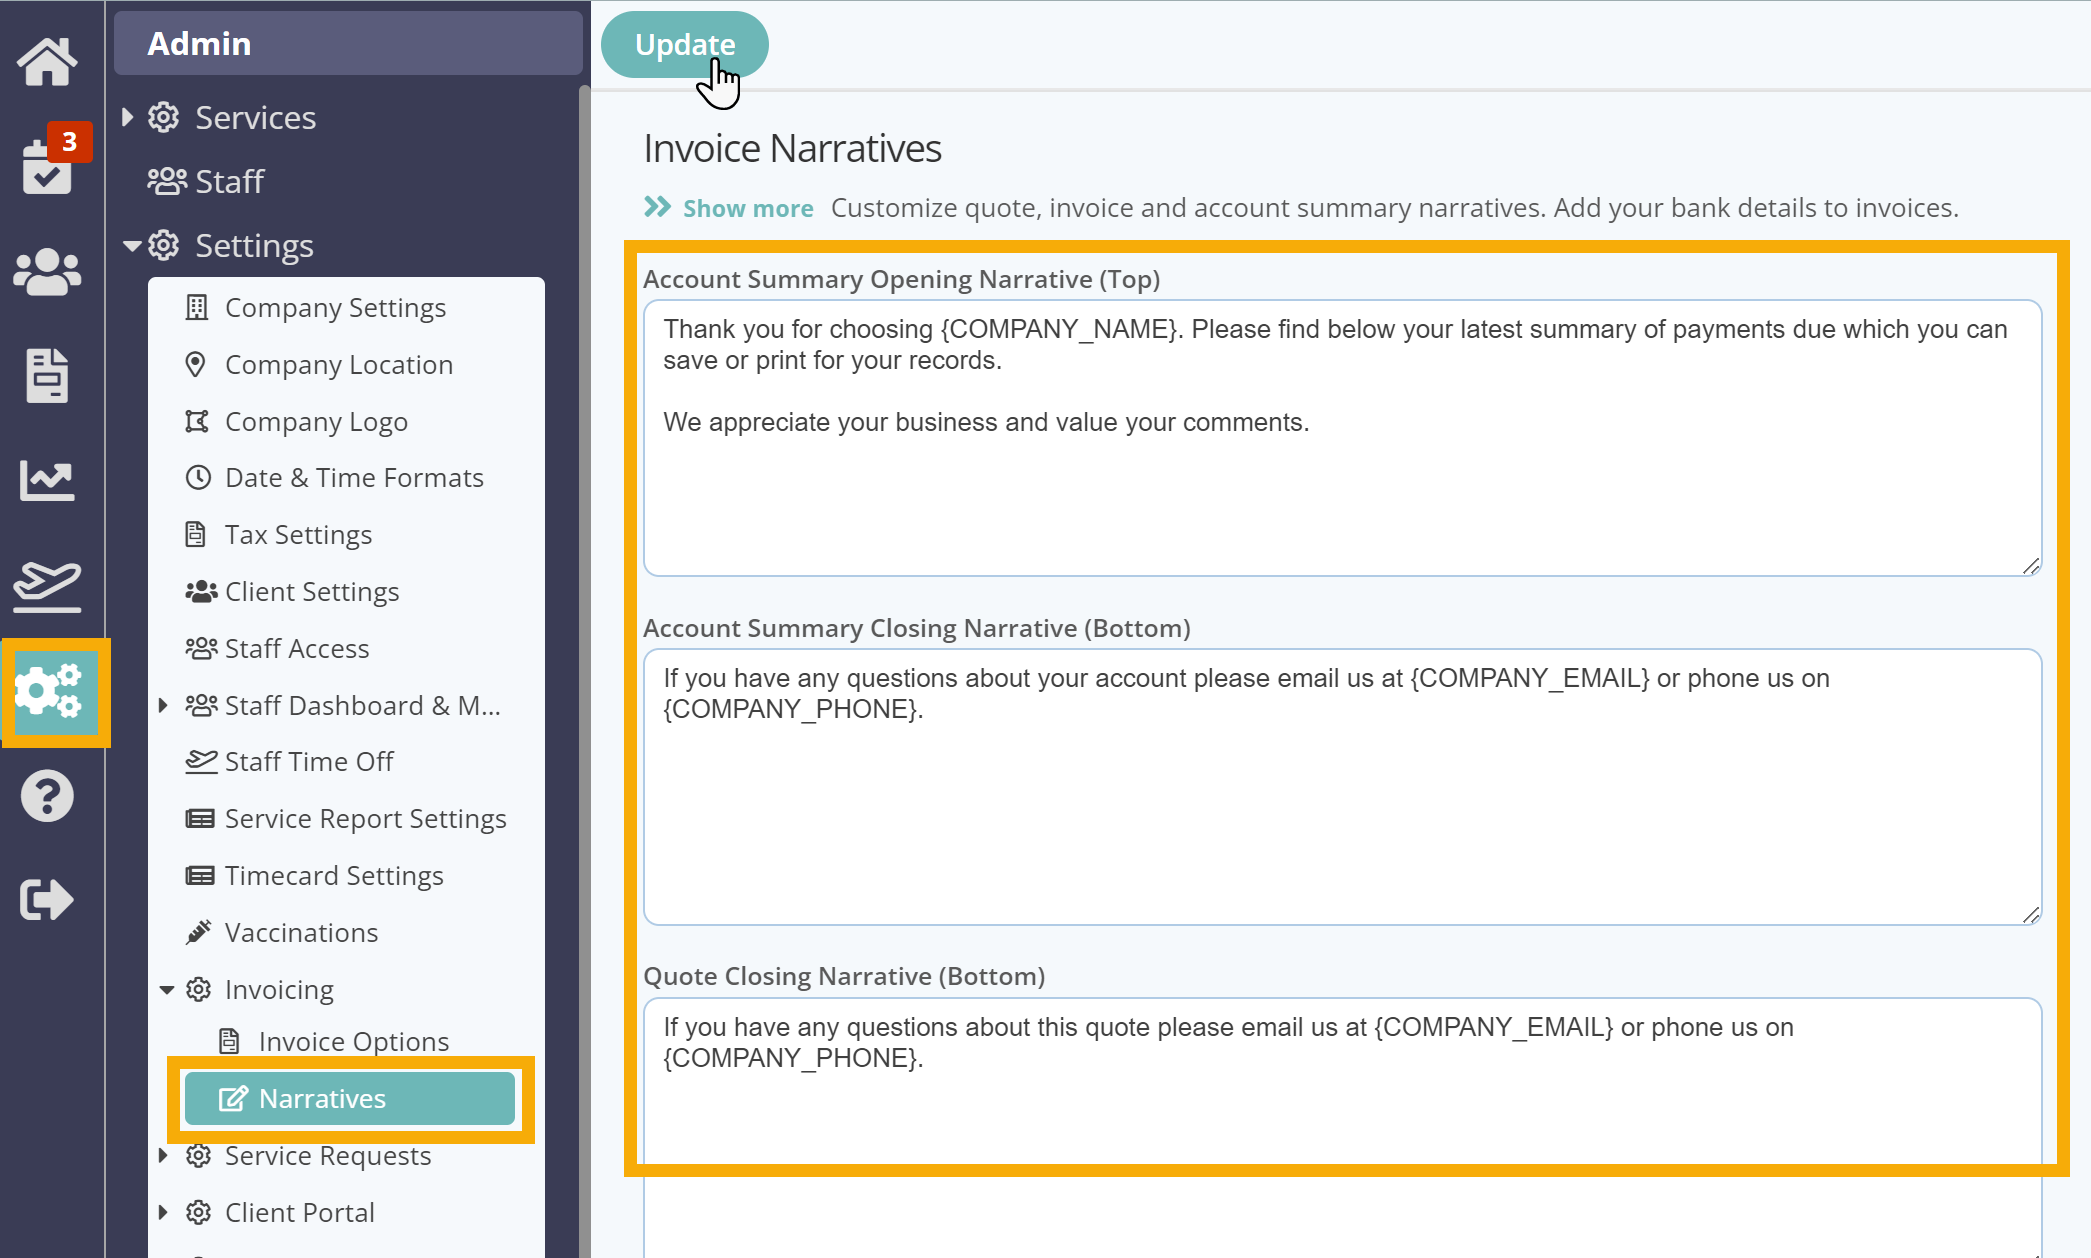
Narratives: You can customize the paragraphs that appear on the Account Summary (top and bottom), Quotes and Invoices PDFs to communicate your Payment Terms more effectively to your clients.
Tip: Include your company email and contact telephone number (using Merge Codes) so clients can more easily get in touch if they have any queries on their Account.
14. Service Requests
There are many settings to configure your Service Request functions, including allowing Clients to cancel Services, BCC Service Requests Emails to Primary Sitter, adding Restrictions to booking and cancelling of services. These settings are displayed over several pages under Service Request Settings:
General Settings:
- Allow clients to request services: Toggle ON to allow clients to request services online in the portal.
- Allow clients to Cancel Services: Toggle ON to allow clients to cancel services online in the portal.
- BCC Service Request Emails to Primary Sitter: When a client requests services through the Client Portal a notification email is sent to the Company Email. Toggle ON to also BCC the client's primary sitter on the email.
- Disable Service Request Confirmation Email: When a client requests services through the Client Portal they receive an email receipt notification. Toggle ON to prevent sending this email.
- Disable Service Scheduled Confirmation Email: When a client requests services through the Client Portal they receive an email confirmation at the time you schedule the services. Toggle ON to prevent sending this email.
- Only show Services for Pet Types Registered in Client Account: When a client sends in a Service Request from their portal, you can restrict the list of service items they can view to be relevant to the Pet Types they have registered in their portal.

Restrictions:
The Restrictions page enables you to set your Service booking and cancellation restrictions to reflect your company cancellation policy. You can choose either a number of days or hours from the service start date to prevent clients from either booking or cancelling that service. For example. only allow service cancellations 48 hours before the service start date.

Email Narrative:
The Email Narrative page enables you to customize your Service Request confirmation and cancellation emails.

Advanced:
The advanced settings in Service Request settings enable you to manage service request notifications, handling abandoned requests in a Clients shopping cart and auto assigning requests to a Service order.
- Auto submit left in cart / basket after inactivity (hours): This safety net submits requests abandoned in a client's shopping cart after the set number of hours of inactivity.
- Company receives emails of service cancellations if within (days): Set the number of days from the service date that the company email receives a notification if the service is cancelled. To receive a notice of every cancellation, set to 1000.
- Staff receives emails of service cancellations if within (days): Set the number of days from the service date that the Sitter receives an email if a service is cancelled. To inform staff of cancellations in the coming week, set to 7; to inform staff of cancellations within the coming month set to 30, to not send cancellation emails to staff, set to 0.
- Auto assign requests to Order: Assigns Service Requests from the Portal to a new service order. Alternatively you can review then assign them to an existing order or a new order.

15. Client Portal
The Client Portal settings enable you to control the appearance and functions of the Client Portal.
General Settings:
- Show client data: Toggle ON to allow clients to view and update their information. You can also control their access at field level and make certain fields mandatory.
- Allow tips: Toggle ON to allow clients to add a Tip to their Invoice if paying by debit/credit card (worldwide) or bank transfer (US only).
- Always allocate tip to primary sitter: Toggle ON to allocate the tip to the primary sitter even if another staff performed the service.
- Show Sitter: Toggle ON to display the assigned staff for the service in the Client Portal.
- Show Check-in/check-out data: Toggle ON to display the check-in/check-out time and location in the Client Portal.
- Disable Portal Login: Toggle ON to prevent all clients from accessing the Client Portal.

Customize Portal:
You can customize the Client Portal to reflect your current company brand including colors and logo.

Below is a helpful video where you can learn the various ways in which to personalize your Client Portal:
Customize Login:
Similar to your Client Portal, you can also customize the Client Portal login screen, Including your logos, branded colors, as well as adding a customized Header and Footer.

Links:
Here you can add up to eight hyperlink buttons onto your Client Portal to provide quick access to pages such as Facebook, Instagram, pricing or any other webpage.
- Show other links: Toggle ON to add links on your Client Portal.
Tip: Links can provide a helpful clickable link to your own website or social media pages to relay important information for example: annual closures or your current price list.

Registration:
You can add a Register button onto your website for new clients to sign up to your service and follow your registration procedure.
- Text Before Successful Registration: In your messages, use merge codes such as {COMPANY_NAME} to personalize your message.
- Set your Service Area Radius: Define an area you do business in to prevent people from outside your area trying to register with you. If clients are outside the service radius, they will be presented with a message and a form to complete.
- Allow new client Registration: Toggle ON to allow new clients to register direct from you
- Show Registration Link: Toggle ON to include the option to register online via your Client Portal Login screen. Toggle OFF if you do not wish all potential new clients to register via your website and by invitation only.

16. Currency
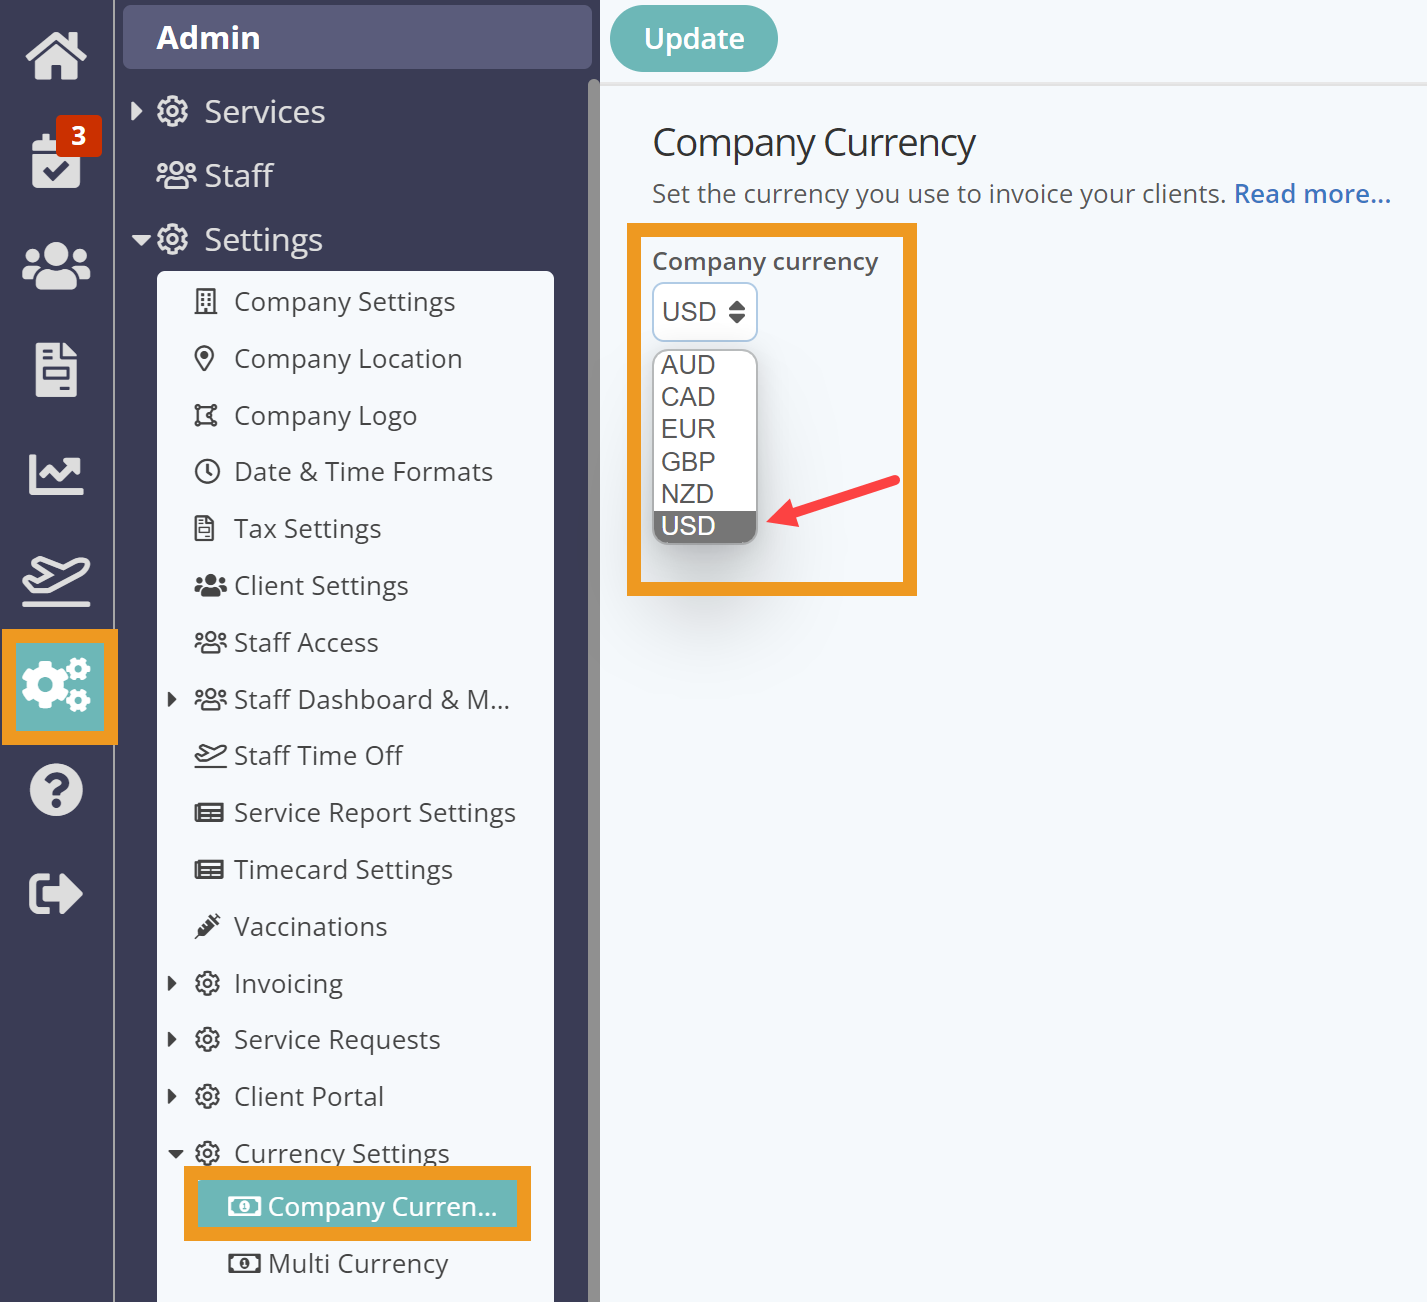
Multi Currency: Allows you to invoice clients in different currencies.
- Toggle on Enable multi-currency.
- Enter the correct exchange rates.
- Click "Update."
Tip: For example, some businesses in the United Arab Emirates (UAE) use multi-currency to take payments in both US$ and GBP for different client situations.

17. Schedule Settings
On the Schedule Settings page you can control the appearance of your Schedule for yourself and your team.
- Show Cancelled Services In Staff/Client Schedules For: Select an option to control when or if cancelled services appear in the staff schedule after they have been cancelled.
- Daily Email Of Staff Schedules For Next: Send an email to staff (automatically overnight) with their schedule. Select how many days of their schedule to include. Alternatively, select "0" to not send schedules. Staff need a Work email and "Email Schedule" toggled ON in each staff record.
- Sort Schedule By: Sort your schedule by either "Staff by time" where all services are first grouped by assigned staff member, then sorted by time, or by "Time" where all services are sorted in time order only.
- Show Time Default: Toggle ON to “show the time” a service is scheduled to start or toggle OFF to display the general schedule column such as "Morning" instead.
- Default Service Detail: Set the default level of detail you wish to see when you open up your schedule. Click the + or - Detail to change the detail level in your schedule to provide more or less detail at any time.
- Display Client in Schedule: Choose how client name is displayed in your Schedule: Client name, Pet name or both.

Options:
- By time
- Service Item Group
- Client Area
- Client Type
- Staff Type

18. Email Settings
You can choose to send emails from your company email account via SMTP or your Google account.
- Use Staff's Email Address: Delivers client email responses to the sender's email, instead of only to the Company Email. Useful for businesses that have departments run by different staff members. Responses to Service Reports sent by sitters will also be delivered to the sitter who sent it.
- BCC All Direct Emails To Company: Receive a copy of emails sent to your clients. A useful tool to provide proof that a communication was sent to a client.
- Email Configuration Type
Note: SMTP is a connection between your email and PSP. Your email provider can terminate that connection and the connection can be broken by changing your email password. Recommended Settings are driven by those outside factors.- SMTP: Connect your business or personal email account using SMTP. If disabled, emails will be sent via the Pet Sitter Plus email, mailer@petsoftware.net.
- Google: Connect your business or personal Google email account.
- Only Use For Direct Emails: This setting sends quotes, invoices and service reports via the Pet Sitter Plus email, to help ensure delivery. Leave this ON.

Read more about your Email Configuration for SMTP
Read more about your Email Configuration for Google.
Signposts...
Was this article helpful?
That’s Great!
Thank you for your feedback
Sorry! We couldn't be helpful
Thank you for your feedback
Feedback sent
We appreciate your effort and will try to fix the article