Once you have installed a button on your website with a link to your online registration page, then new clients can simply click this button to start the registration process. Online registration enables new clients to enter their contact, pet and routine data at their own convenience and saves you time keying in this information.
Tip: Your terms and conditions are included in this registration process. By allowing new clients to register themselves, they have to "agree" to your terms before they can proceed. See Add Terms and Conditions to Client Portal.
Note: This feature is for new clients where:
- You have no existing business dealings, and
- You haven't created a client account for them in Pet Sitter Plus yourself.
Their new client account will be created automatically in PSP as part of the process described below.How does the registration process work?
Navigate to the Client Portal using the link sent to you for new clients to register.
For example: "https:// XXXX.yourcompanyname.petsoftware.net /clientportal/register"
Step 1
- Assuming you have made a button or link available on your website then your client simply needs to click this link to activate the registration process.
- A new tab will open in the client's browser requesting their details to set up an account, i.e., email address, client name and password.

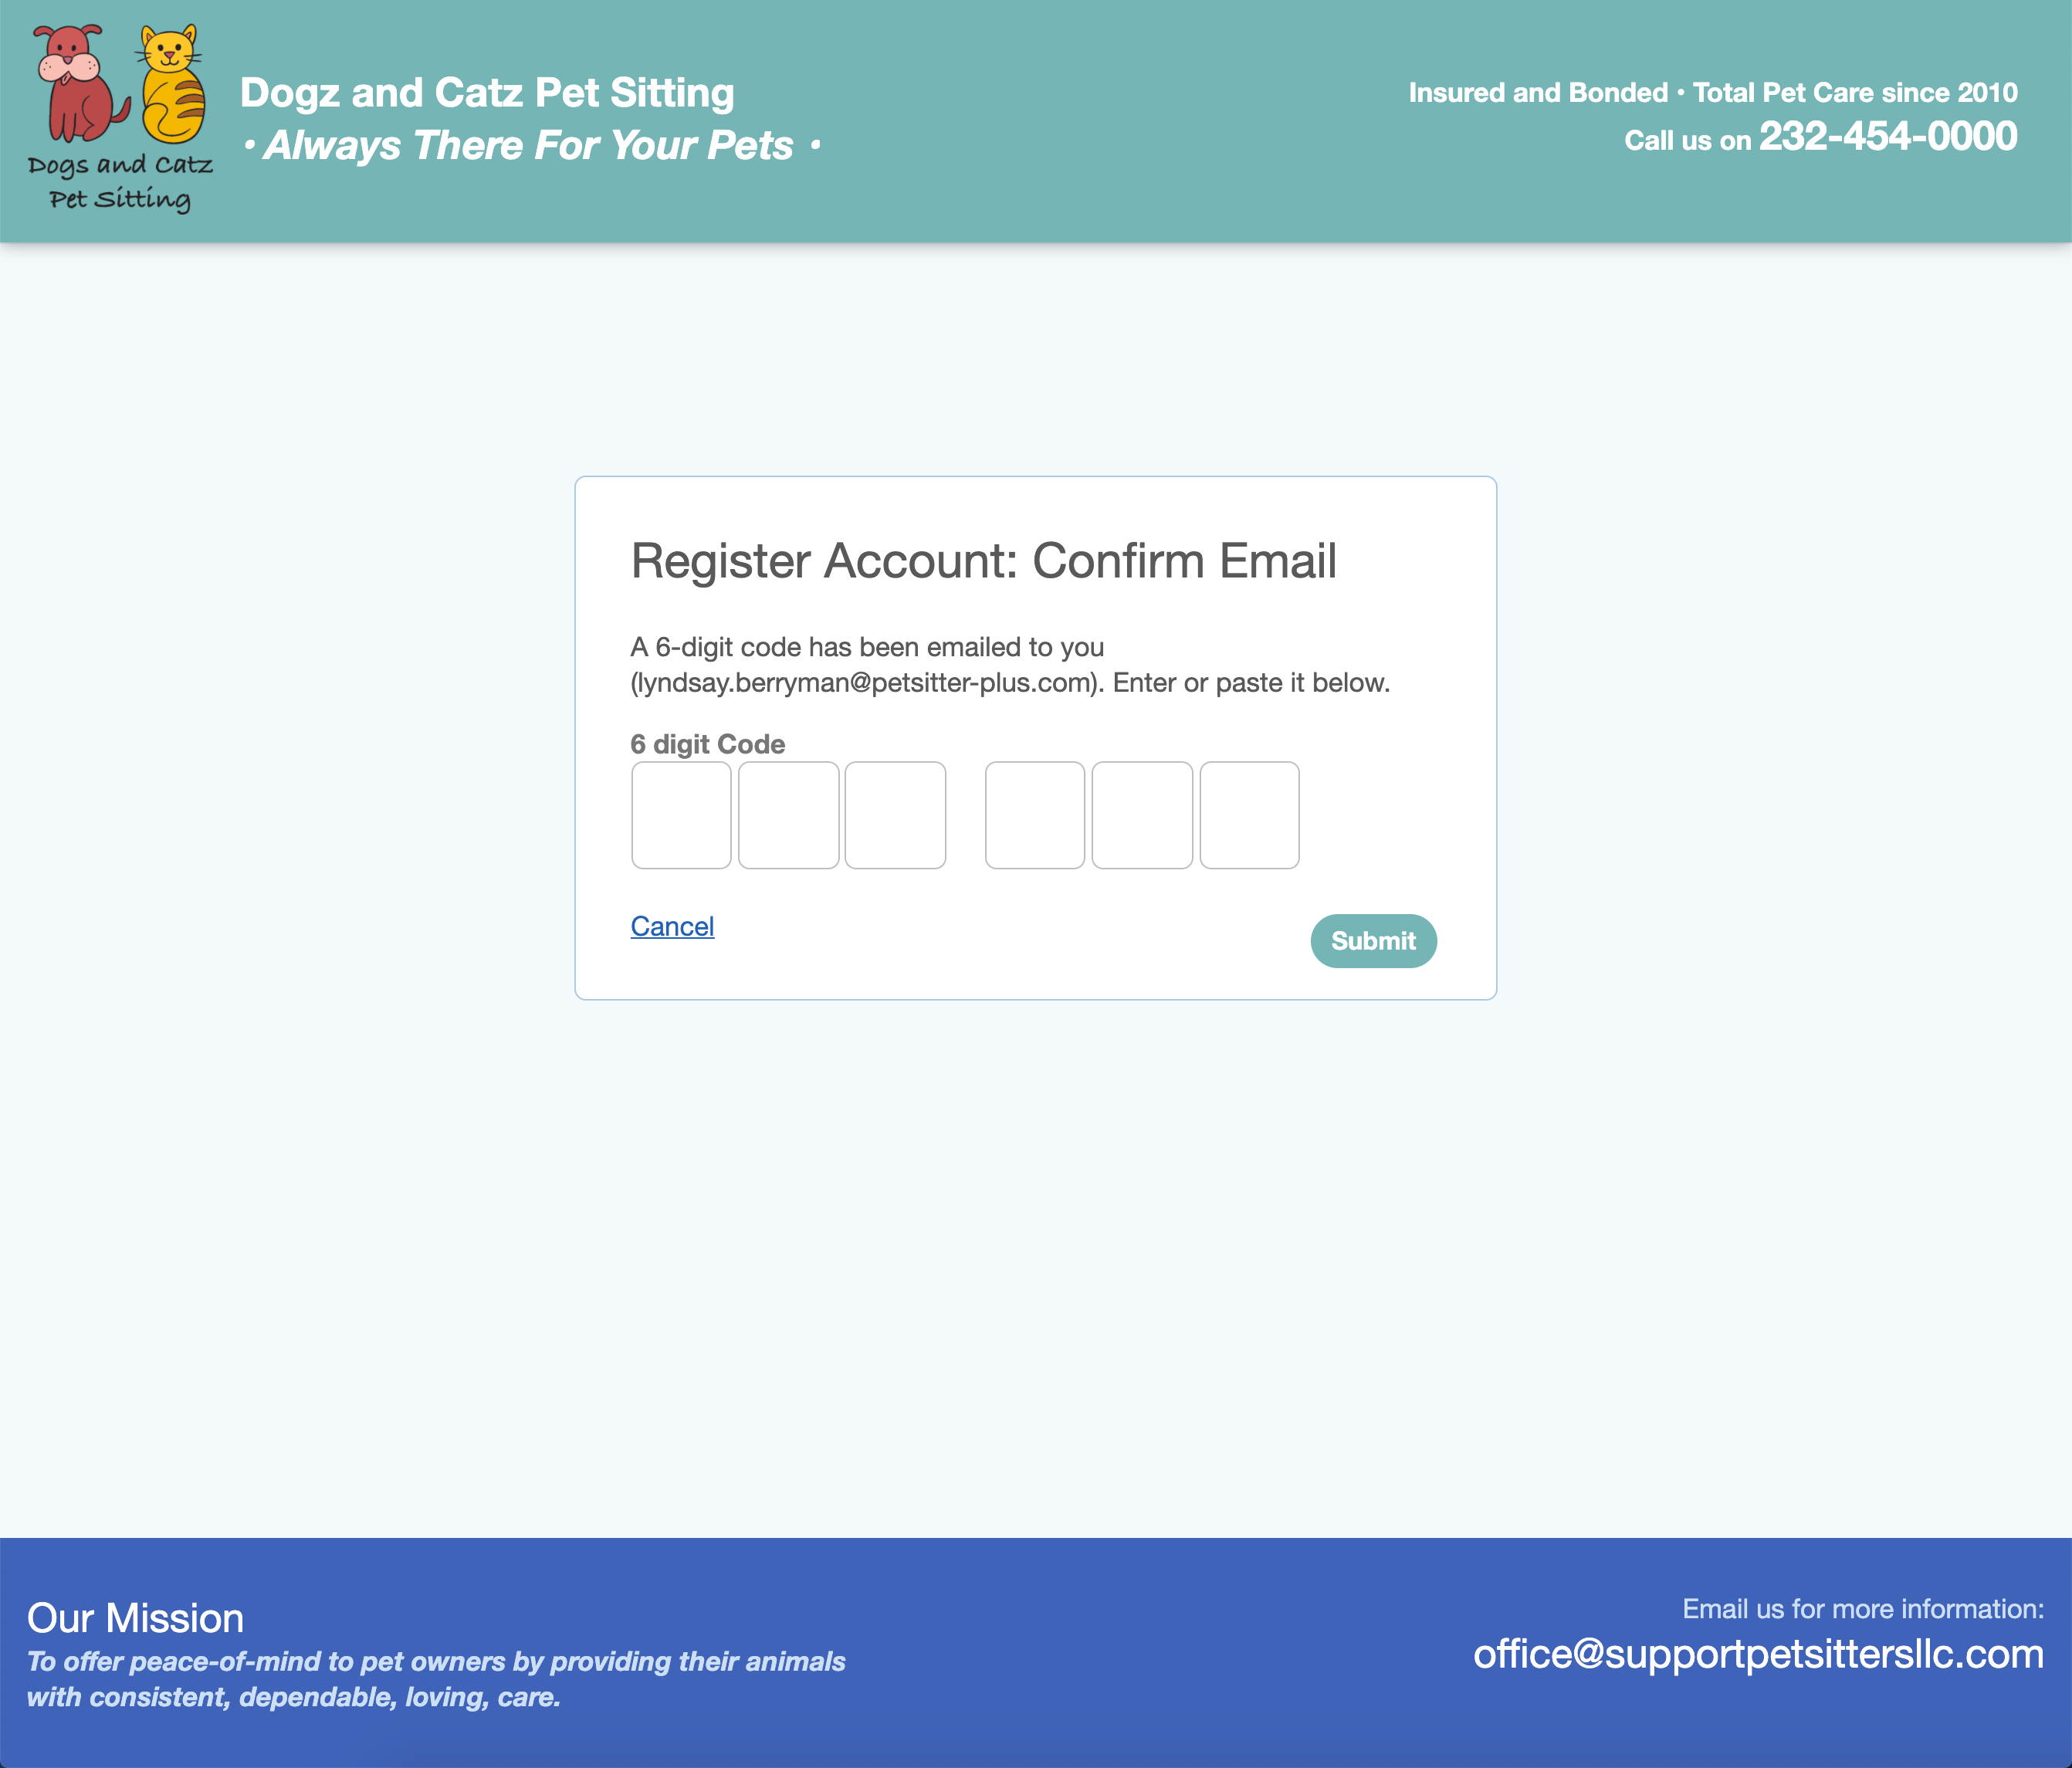
Step 2
- An email will be sent to the email address registered on the client account with a 6-digit secure code.
- Enter this code and click "Submit."
Step 3
You will see the Welcome Message to new clients who have registered.
- Click "Complete Registration."
Tip: If you would like to setup/personalize the text that appears after successful registration, see Add Welcome Message for New Client Registrations.

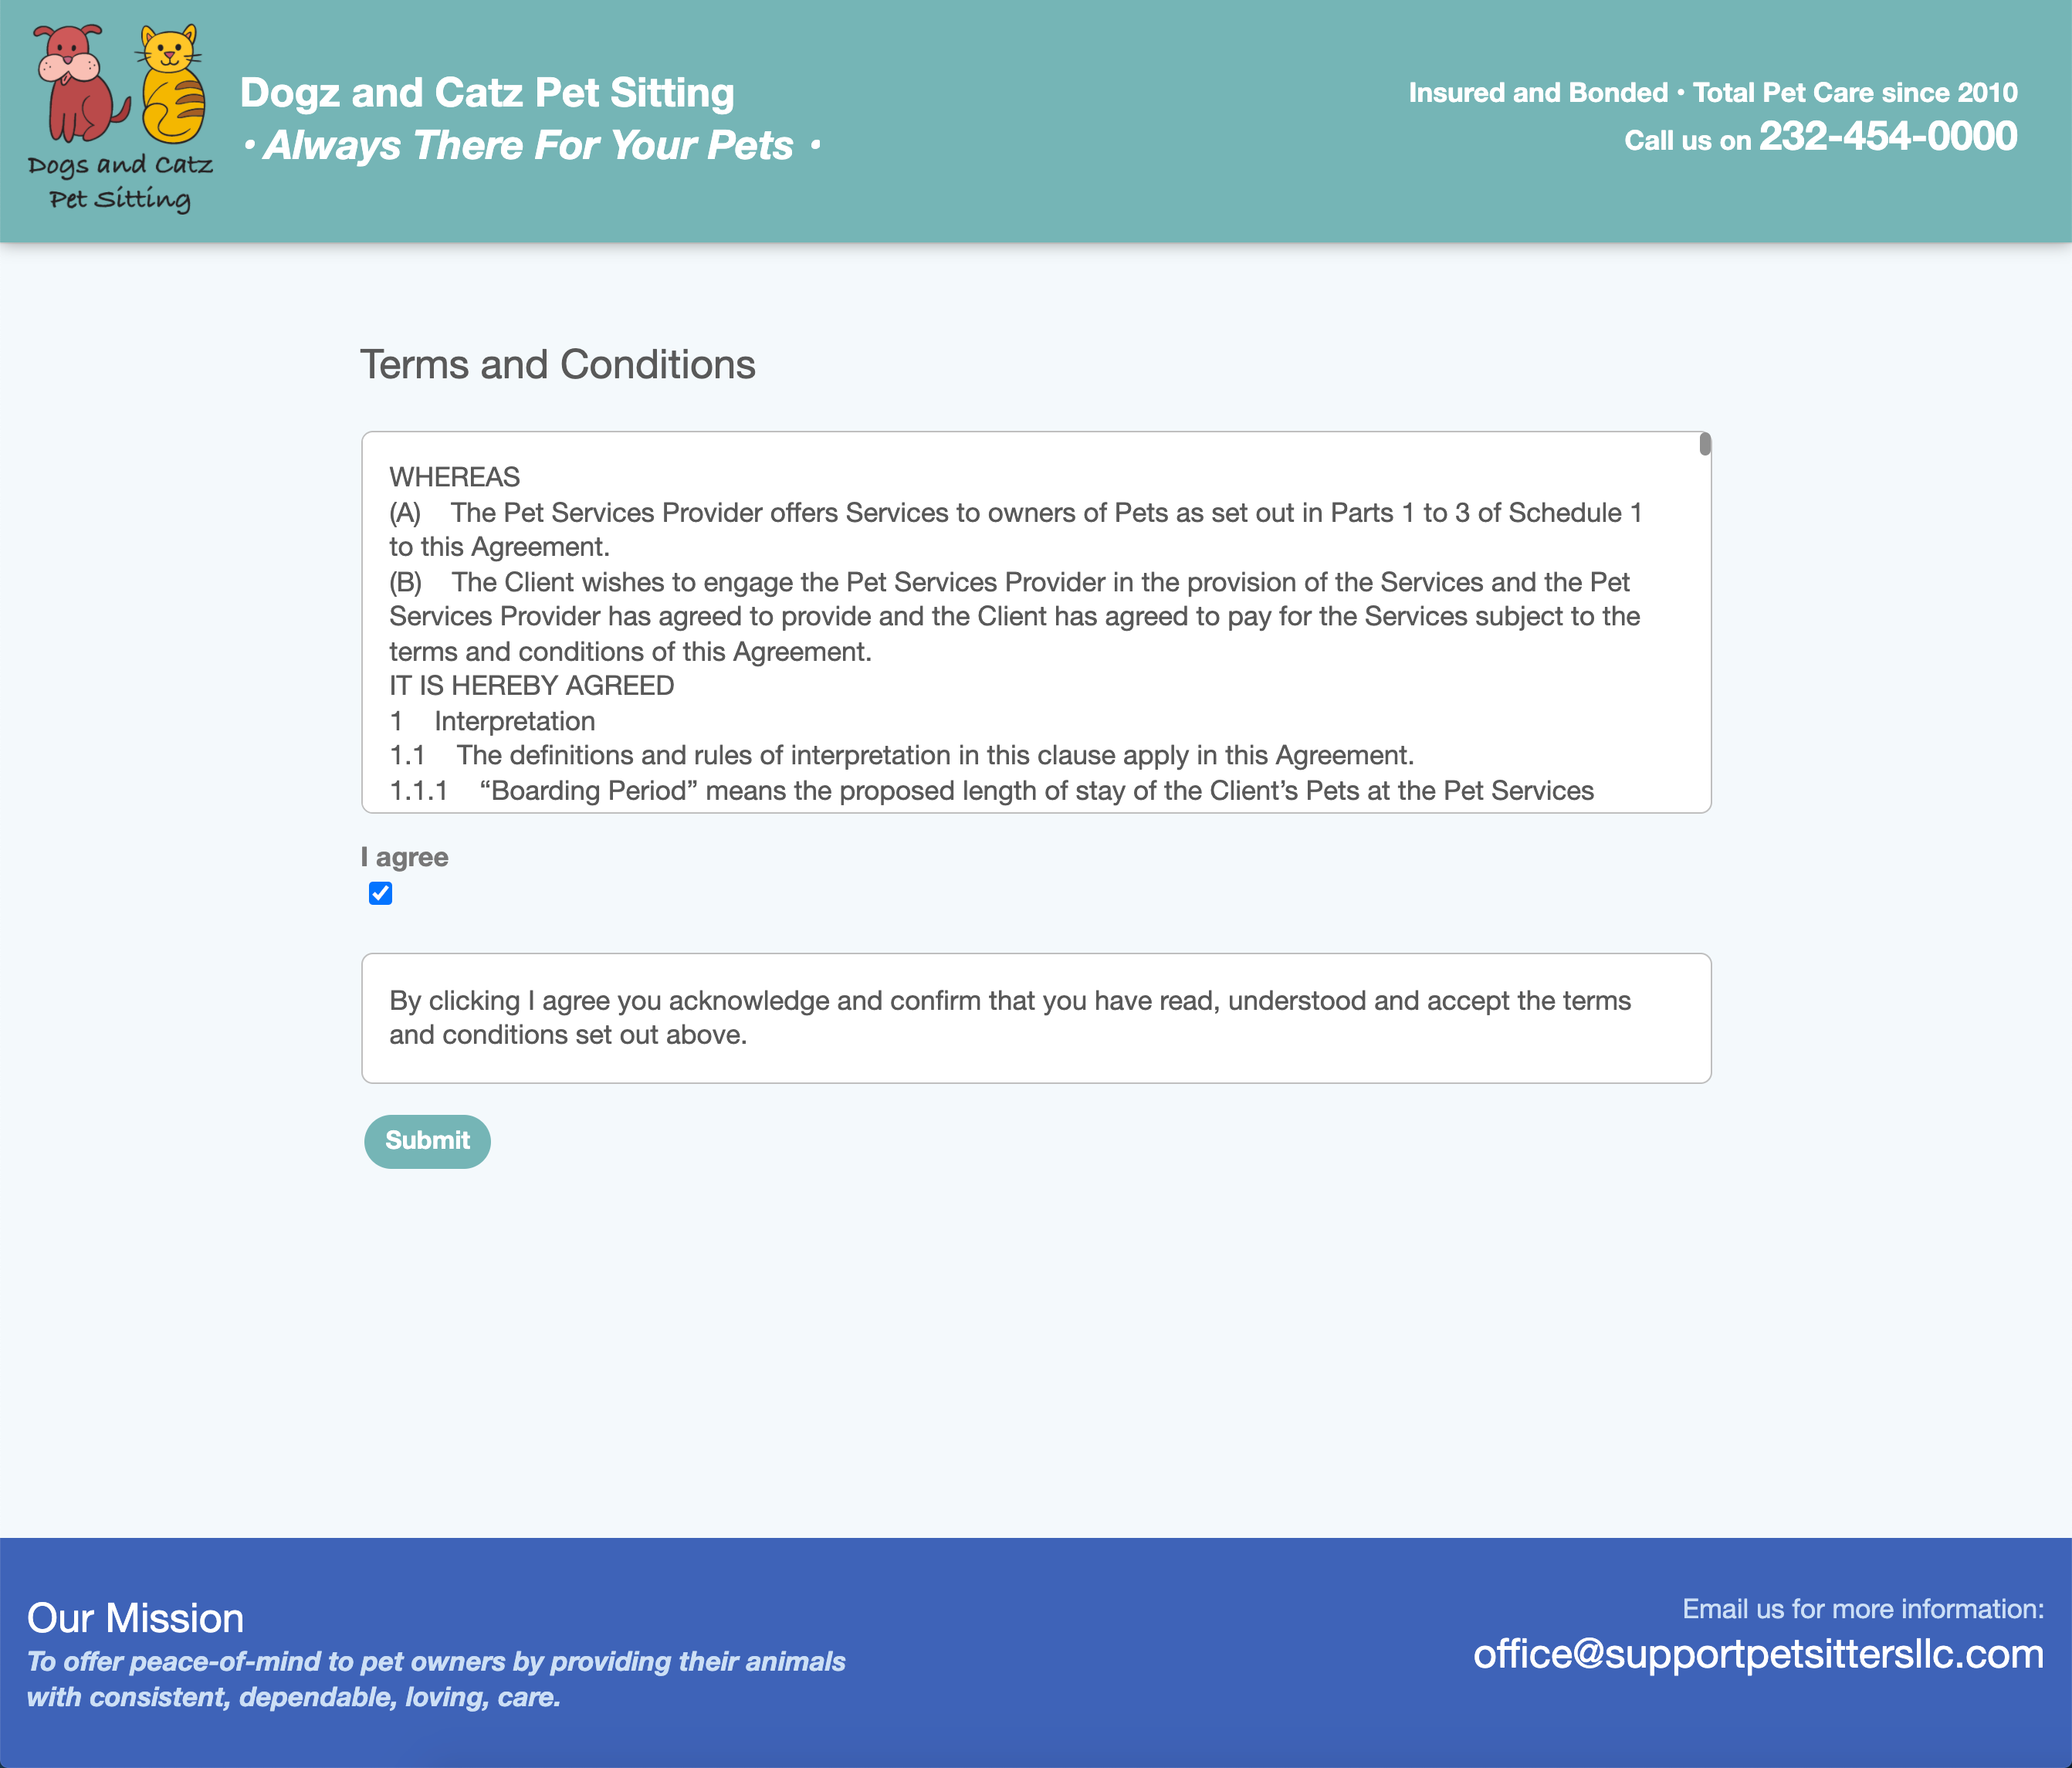
Step 4
If you have entered the text for your Terms, the client will be required to "agree" to your terms and conditions.
Tip: If your terms and conditions do not appear on this screen, then you have not entered/pasted them into Client Portal Settings - please refer to How do I add my Terms and Conditions to the Client Portal for how to do this.If you have left the terms and conditions blank, this step will be missed out and clients go straight to Step 5.
Step 5
The client will then be taken to complete the account setup, including adding all their personal and pet details. If you have set up "required fields", the client must enter this information before they can access their account. These will be indicated by a red asterisk * and an error will be returned if they click "Update" without entering information in the required fields.
Note: You can set certain fields to be mandatory for clients to complete when they register. These are called "required fields" and they are set up in Custom Fields.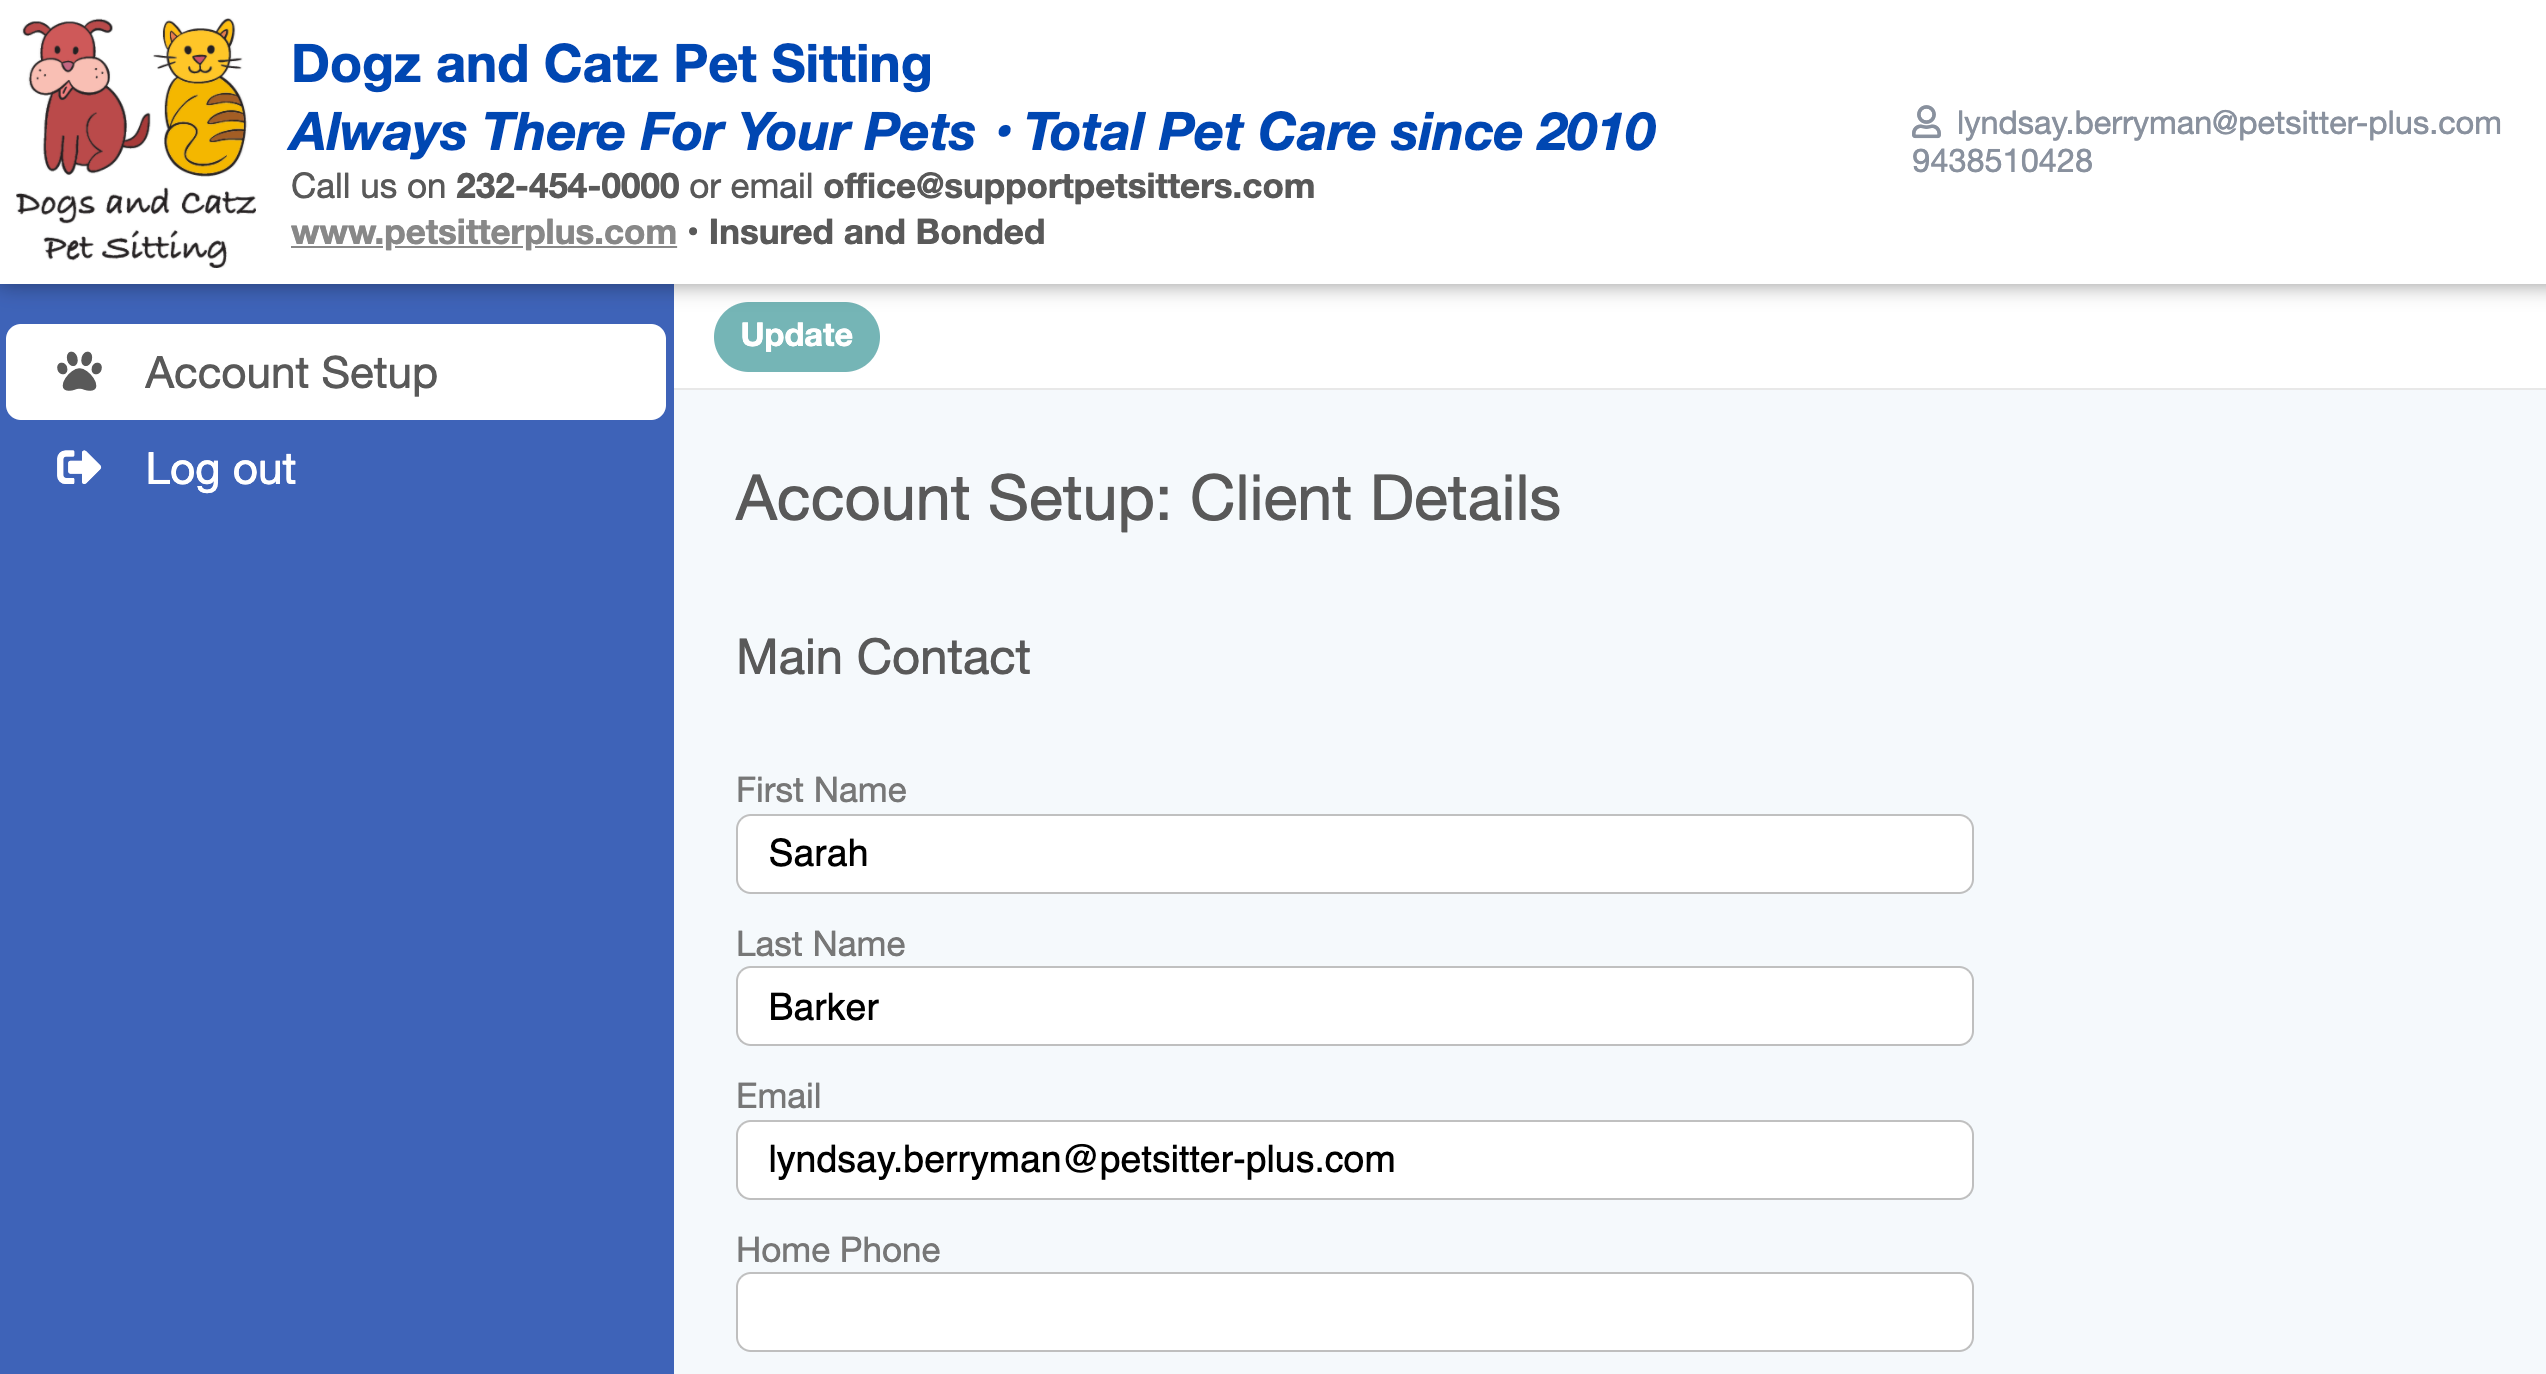
Step 6
- When your new client completes their account setup, they will be taken to the "My Information" section of your Client Portal, where they will be able to input further details about themselves and their pet(s) and take advantage of all of the other features you offer in your portal.
- Once registration is complete you, as administrator, will be sent an email to say a new client has registered and this information will also appear in the notifications section of your HOME screen.
- A client account for the new client will be created in Pet Sitter Plus and populated with the information that the new client has entered during and after their registration.
Was this article helpful?
That’s Great!
Thank you for your feedback
Sorry! We couldn't be helpful
Thank you for your feedback
Feedback sent
We appreciate your effort and will try to fix the article