In this step, you will learn how to...
- Send a Welcome Email
For Further Help:How will I know when a Client has Requested Services Online?
Note: Before you can invite your clients to use the portal, please complete the tutorial section Tutorial 9-3: Payments.Now that you have set up your services, staff and learned how to create an order, send a quote and create an invoice, it is time to learn how to invite your clients to use the client portal.
Note: Inviting your client to the portal is OPTIONAL if you do not wish to offer the ability to book services online.To enable your clients to access the Pet Sitter Plus Client Portal to view their account information, make online bookings and edit their information, you need to provide them with:
- the web site address (URL) for your business's client portal
- the client's unique 10 digit ID (optional). Your clients can log on to the portal using either the same email address as you have on their client data screen or their unique 10 digit account number.
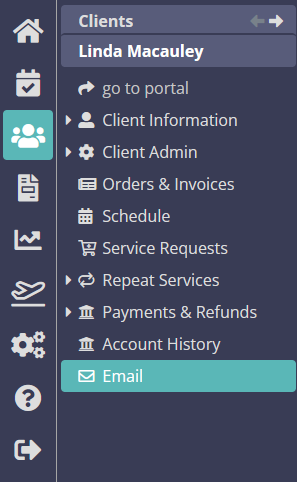
Note: Existing clients MUST already have a client record created in the software, as you did in Tutorial: 4-1 Add Client Accounts. There is a different process for asking new clients to register themselves for the first time, which you can read about later in How does a New Client Register Online?Navigation: Clients > Email
How do I Enable Existing Clients to Login for the First Time?
Scenario: Tammy wants to invite Linda Macauley to use the client portal for making online booking requests and updating her client and pet information.
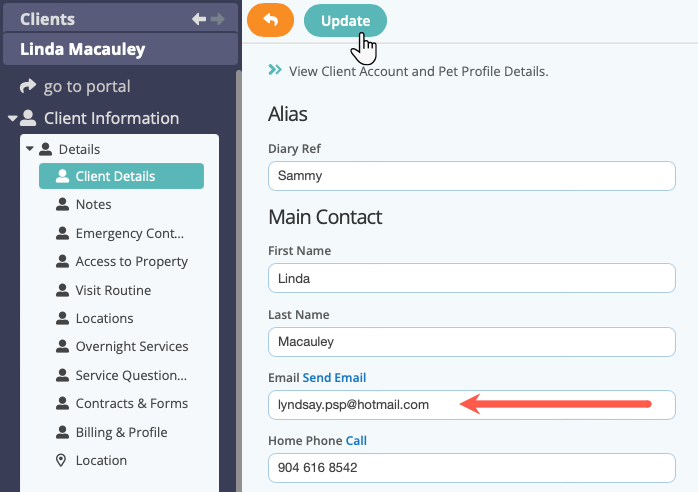
Note: In Step 4 of this tutorial, we will assume the identity of "Linda Macauley" so you can see how clients would initially set their password to log in and make an online booking.1. Firstly, you will need to change the email address on Linda Macauley's client account to your own email address. This is so you can set up the password on this account and see how it works from the client's perspective.
Type in your own email address, eg. "lyndsay.psp@hotmail.com" and click "Update"
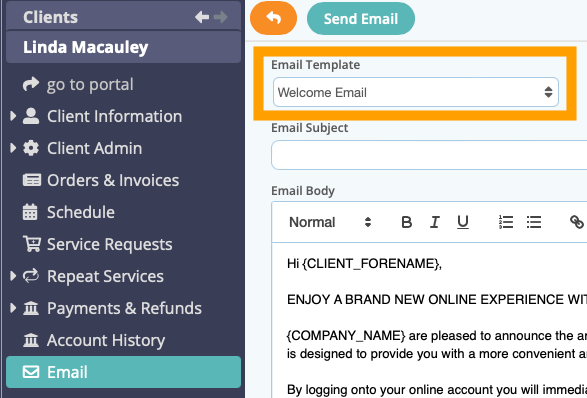
Your Pet Sitter Plus software contains several pre-configured email templates for your use, and one of these is called "Welcome Email."
2. Click the "Email" menu option and select the email template "Welcome Email" from the dropdown list.
3. Type into the "Email Subject" line "Welcome to the client portal" and click "Send Email."
Note: The "merge codes" you can see in the { } brackets – eg. {CLIENT_FORENAME} – will automatically populate with the data in the client record, in this case "Linda" as the client's forename.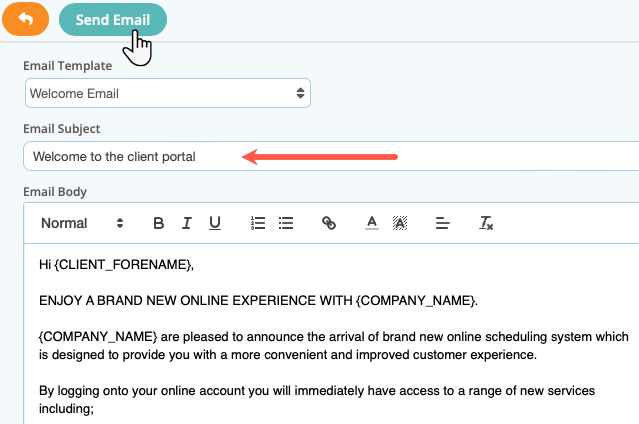
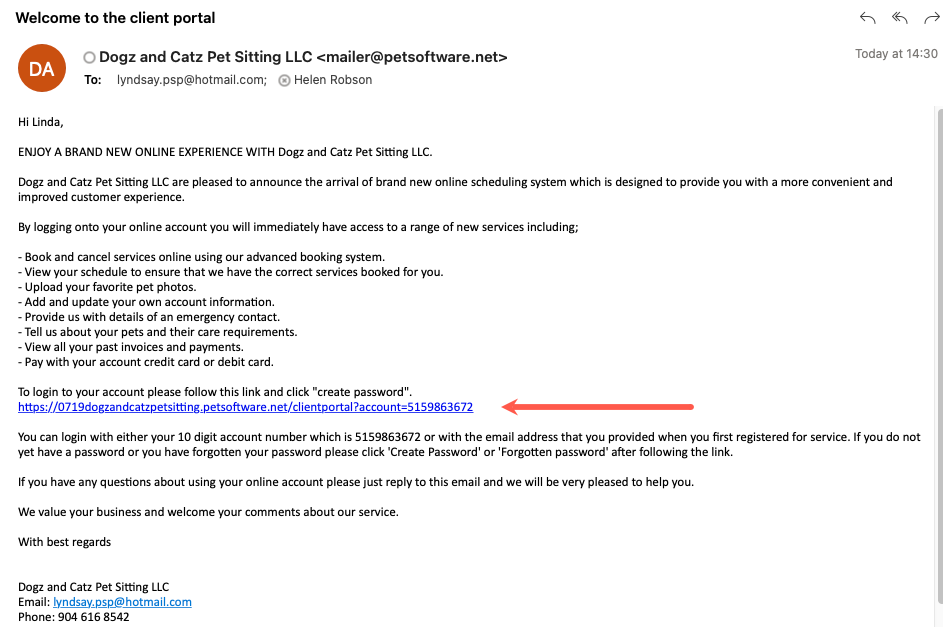
Go to your email inbox to see if an email has arrived from Dogz and Catz Pet Sitting.
4. Click the link in the email to create your password.
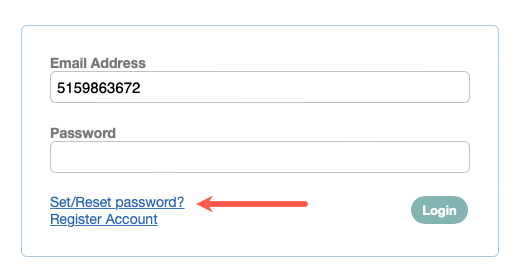
You will see a "set-up" screen from the client portal and the account number already inserted.
5. Click the link to "Set/Reset Password"
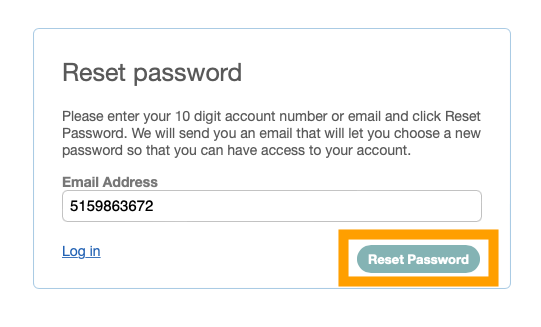
The next screen is an extra security measure to ensure you are in the right account.
7. Enter the code exactly as is shown in the password set/reset email.
- Click "Set/Reset Password" again.
Note: This link must be clicked within 2 hours or the link will expire and you will have to follow the process again.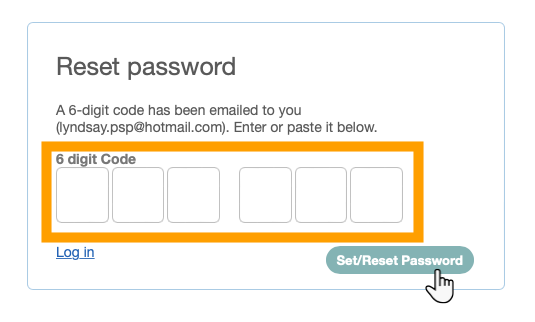
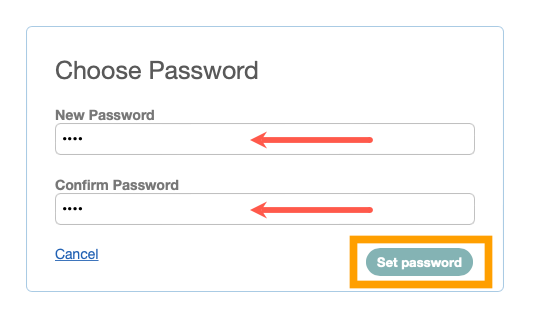
8. Enter a password and confirm it in the second panel. You could use "test" as it is easy to remember. Click "Set password."
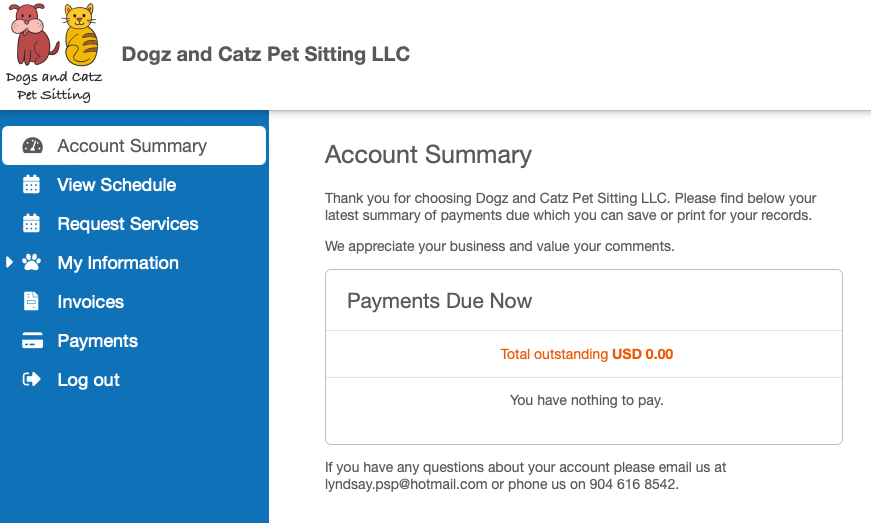
10. You will see the "Account Summary" screen when you are successfully logged in to the portal.
This tutorial demonstrates how to invite existing clients to login to the client portal within Pet Sitter Plus. To gain a greater understanding of the options available when you are ready to learn more, you can take a look at the Help pages for the Client Portal Guide to Client Functions and Allow Clients to Request Services Online
Congratulations! You have completed this stage.
To move forward to the next step, click the link below and then choose the next step:
Was this article helpful?
That’s Great!
Thank you for your feedback
Sorry! We couldn't be helpful
Thank you for your feedback
Feedback sent
We appreciate your effort and will try to fix the article