How do I add a Credit to a Client's account so their next service is discounted?
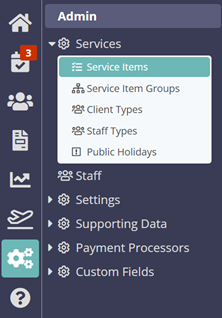
Navigate to Admin > Services >Service Items

- Click "+New."
- Short Description of “Credit” and
- Long Description of “Sundry Credit” (or whatever you like).
- Click "Create New Service Item."

- Add your new Service Item to your Admin group. If you don't have an admin group, put it in the next most appropriate group or make a new “Admin” group by going to Admin > Services > Service Item Groups.
- Click "Update."

- Under the “Advanced” tab.
- Toggle ON “Hide In Schedule” (This prevents the Service Item from displaying on any Schedule).
- Toggle OFF “Show in Portal” (This prevents the Service Item from being displayed in the Client Portal).
- Click "Update."

- Navigate to the client where you need to add a credit.
- Click "Create New Service Order."

- Click on the New Service order.
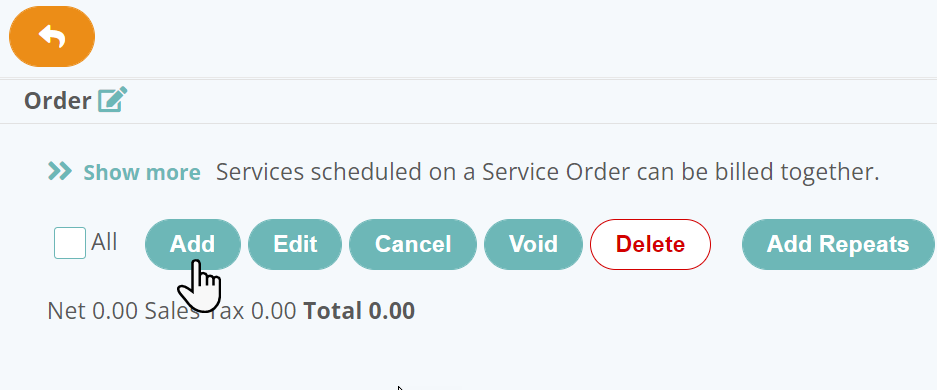
- Click “Add."

- Schedule a “Sundry Credit” for today (or whatever date you like).
- Click “Add.”

- Access the New Service Order you have just created.
- Select the "Sundry Credit" Service Item.
- Click "Edit."

- Enter the staff member that is most appropriate, this will usually be a business owner.
- Enter a minus amount for the credit e.g. -10.00.
- Enter a description of why the credit has been applied in the “Invoice Notes”.
- Finally, click "Update."

- You now have a service order showing the credit you want to apply to the account.
- This credit does not effect revenue (so there are no tax implications) until it is invoiced.
- This credit will lower the value of your services recorded for the month (as it should do), but it will not affect “invoiced” values until you invoice for it.
- Simply make sure any future services (to which the credit should be applied) are added to this order.

Was this article helpful?
That’s Great!
Thank you for your feedback
Sorry! We couldn't be helpful
Thank you for your feedback
Feedback sent
We appreciate your effort and will try to fix the article