An "Area" is often defined as a geographic region or sub-region within your overall service area. Many companies define "Areas" by zip codes, town names or N, S, E, W of city center. Some clients use it for groups managed by different team members. This is helpful for marketing purposes or to schedule sitters efficiently, however it is not a requirement to use "Areas."
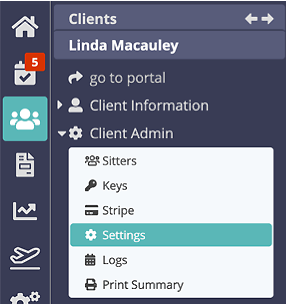
Applying an Area to a Client happens in Client Admin > Settings. Learn more about using using Areas here.
Tip: When you use Areas, you can do the following:
- Run most reports by Area, including Revenue, Receipts and Schedule Stats.
- Filter the Schedule by Area.
- Filter Clients List by "area" and email clients in bulk.
- Invoice by Area.
- 5th bulleted item
Note: Areas are created in Supporting Data, the same list is used to apply to Clients and to Staff.How To Apply an Area to a Client?
Navigation: Clients > access a client account > Client Data > Client Admin > Settings

- Select the Area from the dropdown.
- Click "Update."

Note: If the Area you require is not available, you can create a new one in Admin > Supporting Data > Areas.Was this article helpful?
That’s Great!
Thank you for your feedback
Sorry! We couldn't be helpful
Thank you for your feedback
Feedback sent
We appreciate your effort and will try to fix the article