TABLE OF CONTENTS
When your client makes a payment in the Portal via Stripe, the receipt is automatically emailed to the email in their client account. If your client is not receiving email receipts for Stripe payments, then please check the following:
- Your client may have marked the Stripe.com email address, from which the receipts are sent, as Spam or Junk, so they will need to check their email program to see if the emails have been moved into their Spam folder.
Note:
- When your client initially enters their credit/debit card details, they will be created as a customer in Stripe with the email address from their client account in Pet Sitter Plus.
- If you subsequently change their email address in their account, OR the client changes it in the Portal, this will NOT update their Stripe customer record, which will still try to send receipts to the original email address. You will need to change this manually on their customer record in Stripe.
How do I check my Stripe email settings?
Step 1
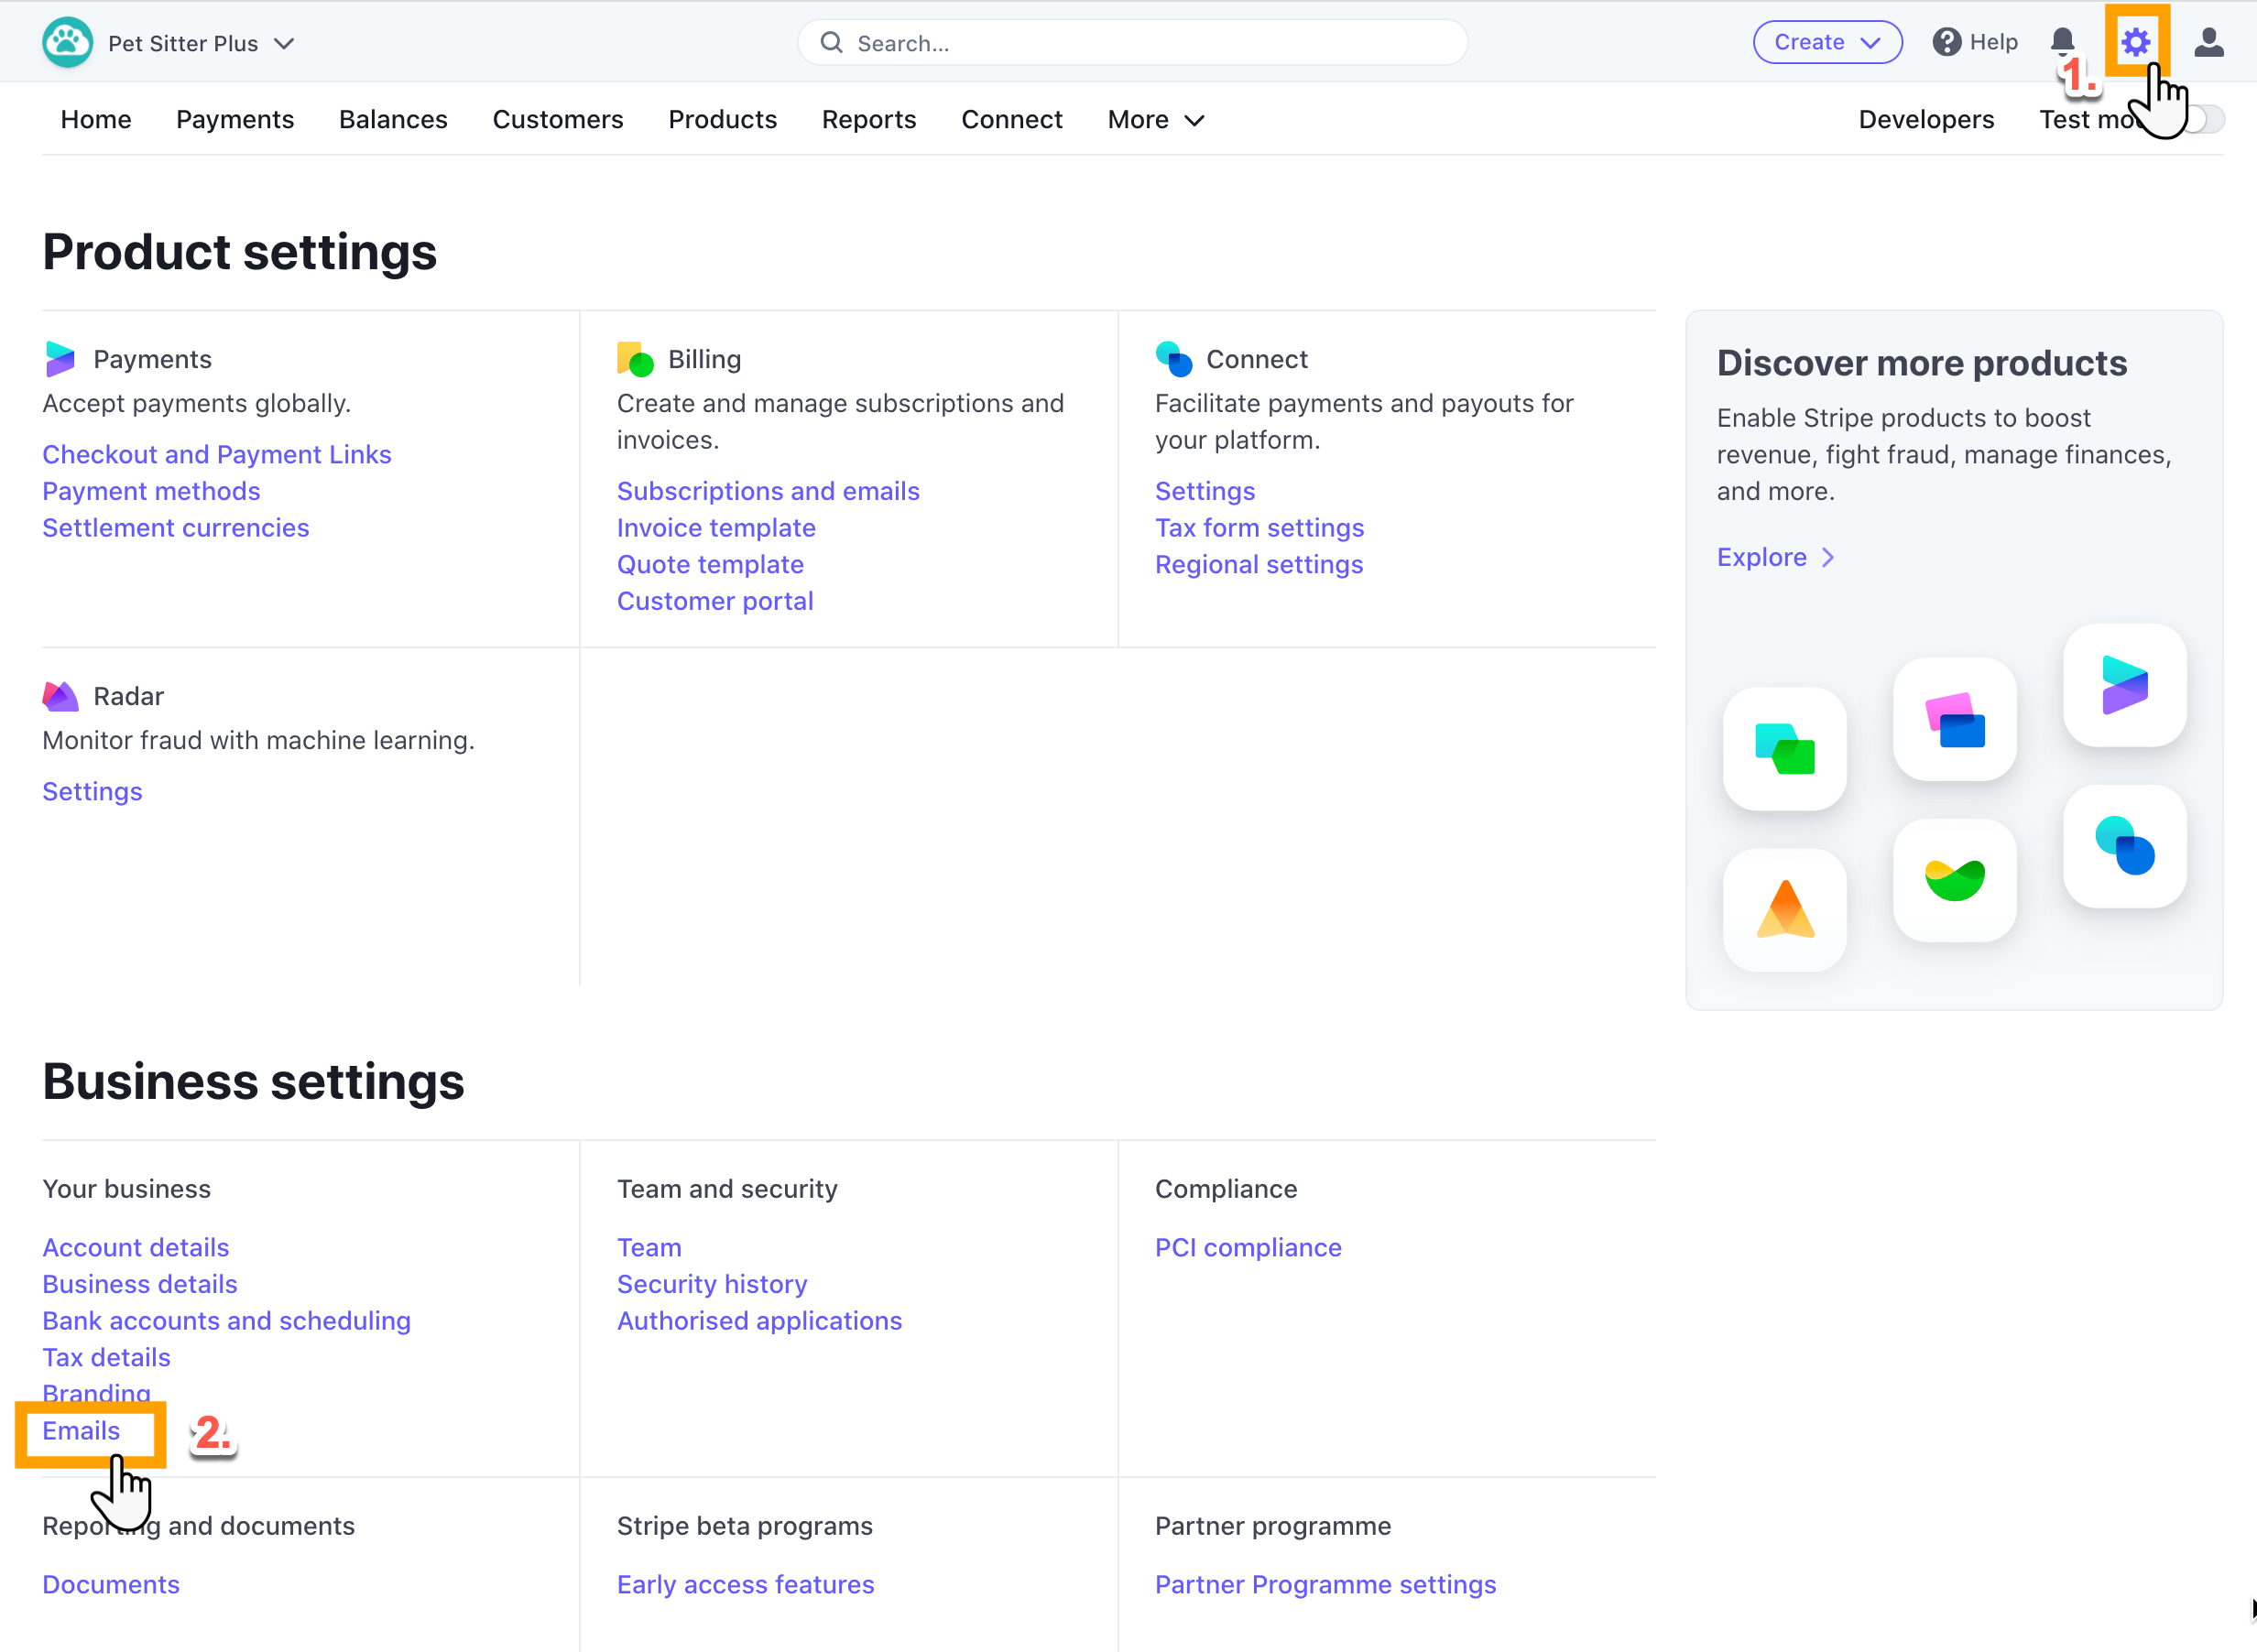
- Log into your Stripe account (via www.stripe.com) with the username and password you set up when you opened your account with Stripe.
- Click the cog icon in the top right to edit your "Settings."
- Then click the "Emails" option under Business Settings.

Note: This login is likely to be different to the username and password you use for Pet Sitter Plus.Step 2
- Ensure the option for "Successful payments" is switched ON to enable Stripe to send email receipts to your clients when a successful payment is made.
- Ensure the option for "Refunds" is switched ON to enable Stripe to send an email to your clients when a refund is made.

How do I Customize my Emails?
Step 1
- Log into your Stripe account (via www.stripe.com) with the username and password you set up when you opened your account with Stripe.
- Click the cog icon in the top right to edit your "Settings."
- Then click the "Branding" option under Business Settings.

Step 2
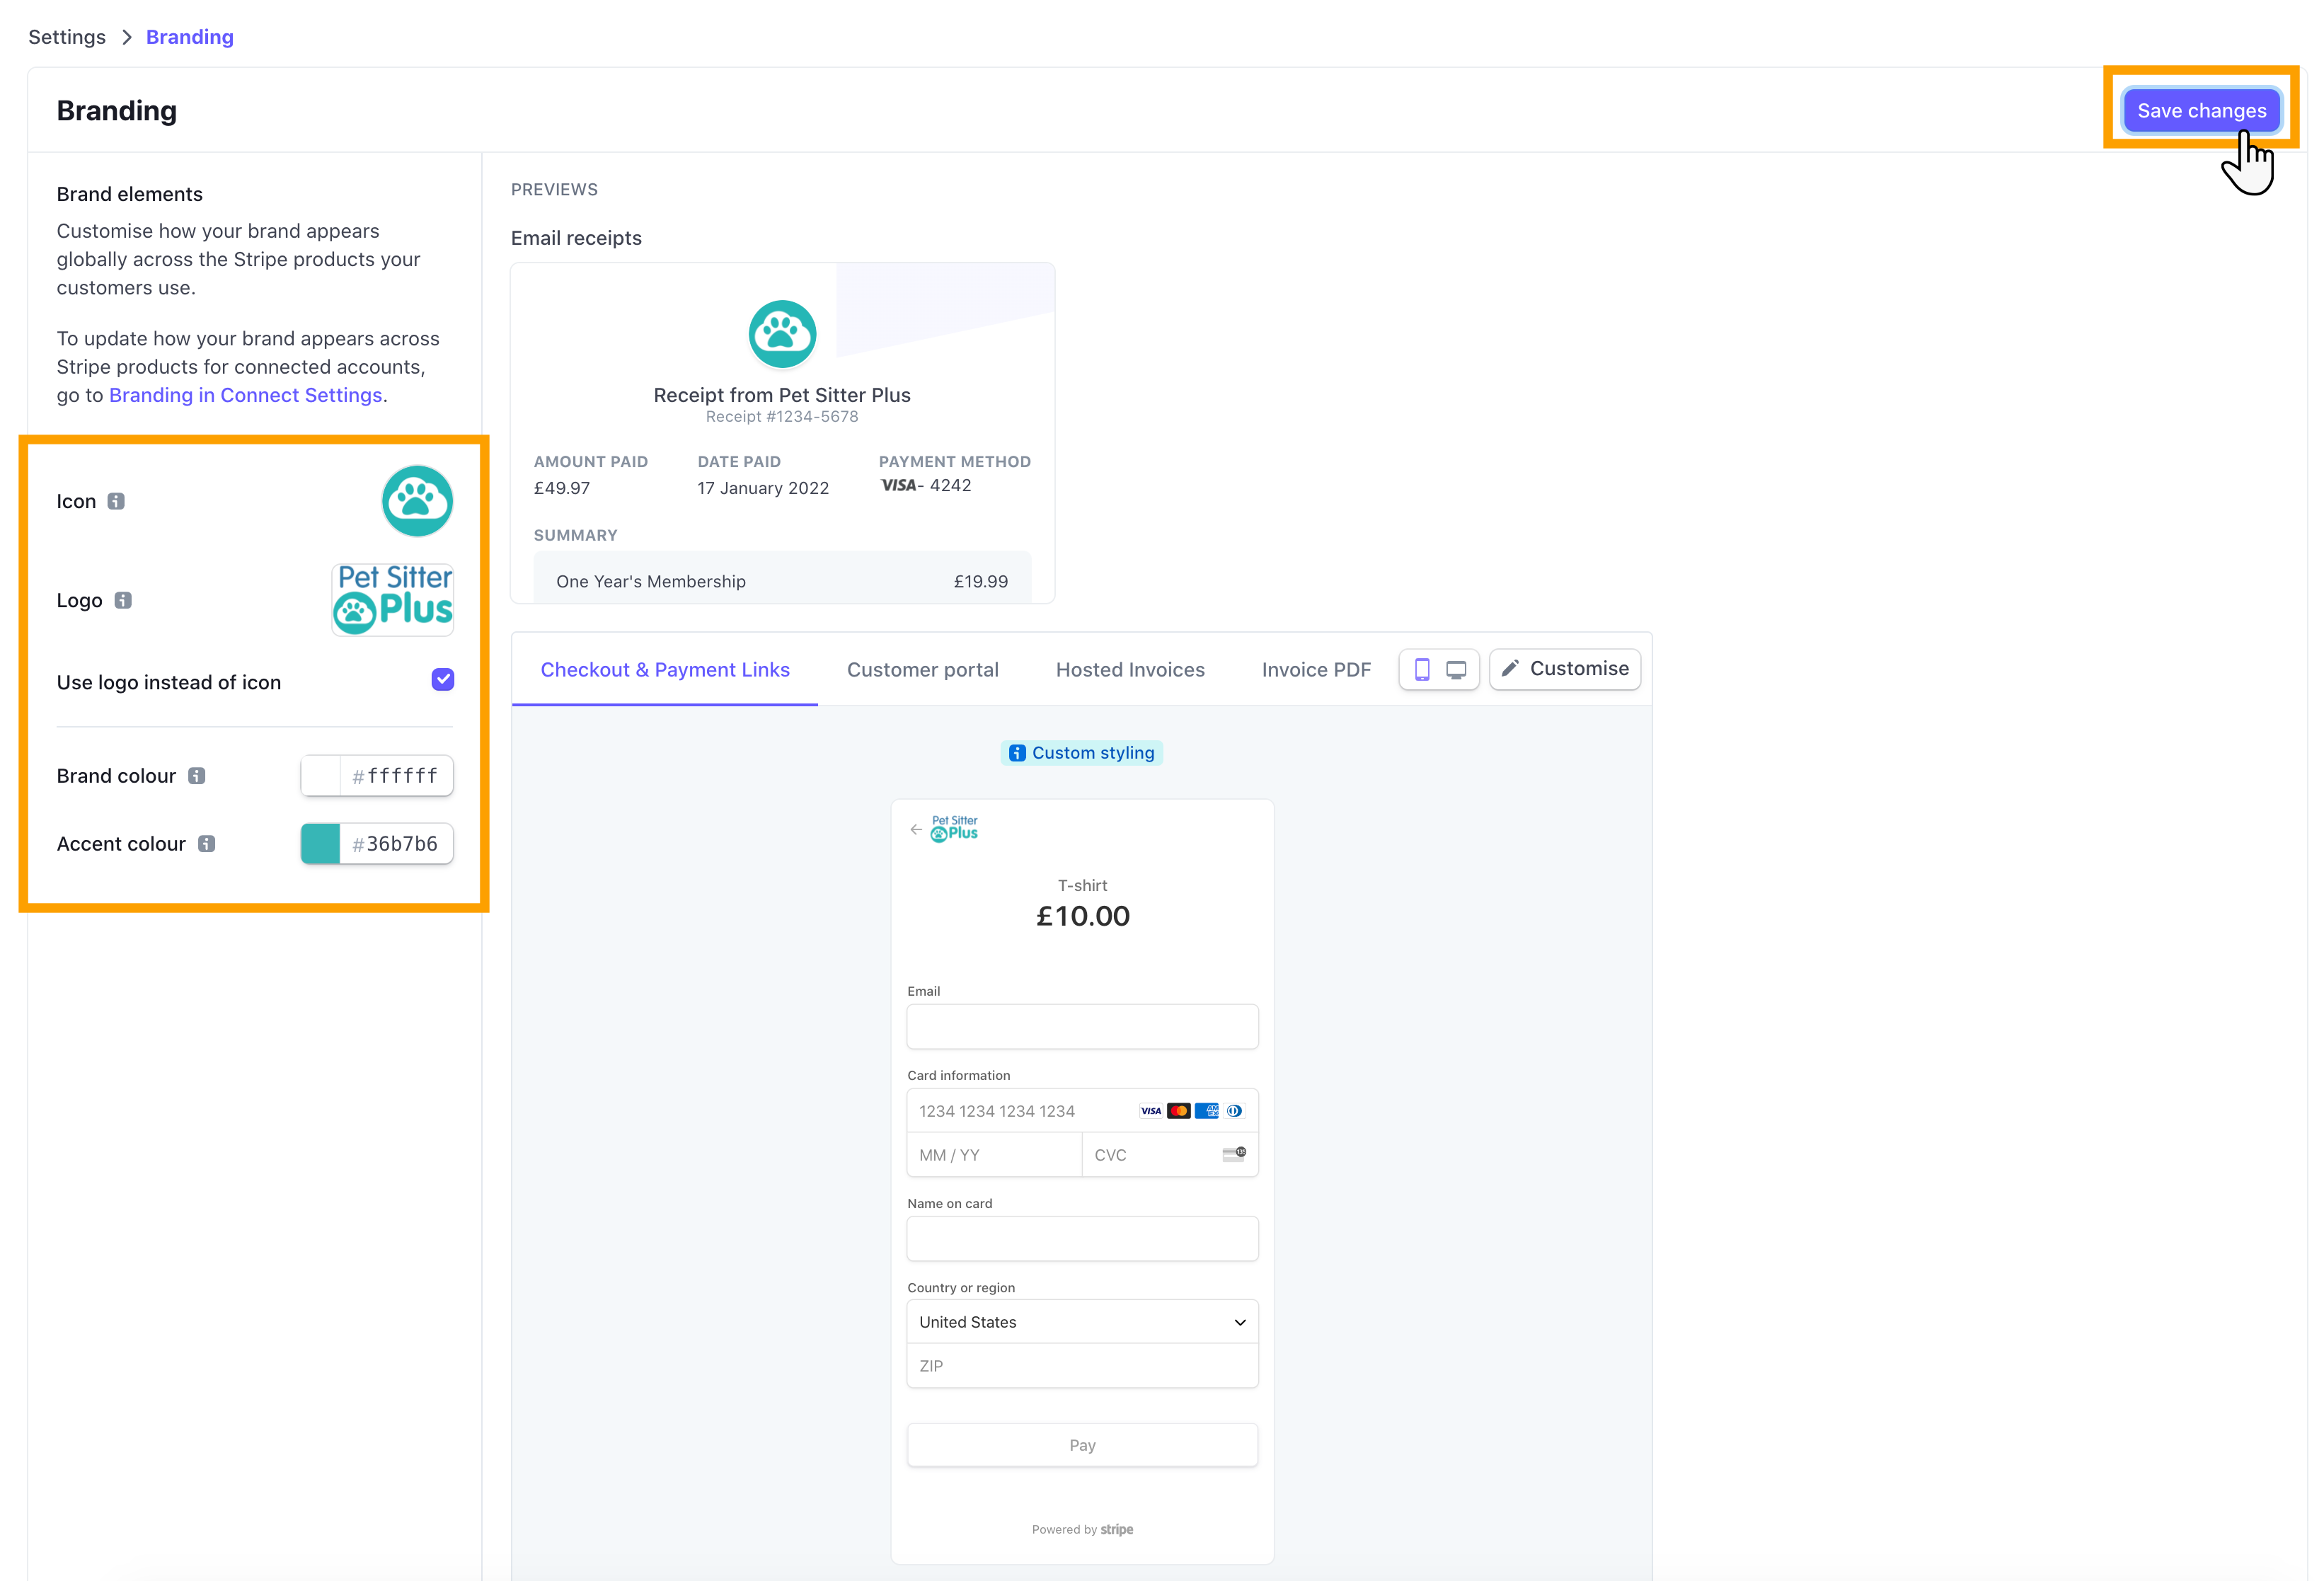
- Hover the mouse over the "Icon" to include your business icon on the emails.
- Do the same over the "Logo" option to include your business logo on the email communications.
- You can also set a background and accent color that matches your business branding.
- Click "Save Changes."

An example of how the email might look to your client is included below.

Was this article helpful?
That’s Great!
Thank you for your feedback
Sorry! We couldn't be helpful
Thank you for your feedback
Feedback sent
We appreciate your effort and will try to fix the article